Introduction
When you’re just starting, having a WordPress site on shared hosting is fine, but as traffic increases, you may begin to experience slow page loading speeds, resource constraints, or reduced control over your hosting environment. This is where a WordPress VPS can be beneficial.
A VPS hosting provides you dedicated resources, improved performance, and the ability to customize your VPS server as you want. It seems like a technical process, but deploying WordPress on a VPS is not as difficult as you think if you take the right steps.
In this guide, you will learn how to install WordPress on a VPS, configure your WordPress database, optimize WordPress, and decide if you should use a managed WordPress VPS hosting or a self-managed WordPress server for your website.
Why Choose a VPS for WordPress?
Shared hosting is a good option to begin with, but it can be restrictive as your website expands. Servers are shared with other sites, so if there is a traffic spike on one site or heavy usage, it can impact other sites.
With a WordPress VPS, you will have your own CPU, RAM, and storage resources, which will make your website run faster and cope with more traffic without slowing down.
If you are new to VPS infrastructure, learn more about what is VPS hosting and how it works.
These are some of the greatest benefits:
- Your site has its own resources: You don’t have to fight with others for server space.
- Enhanced WordPress performance: Increased resources and control of the server lead to better speed and stability.
- Root access: Install custom software, change server settings, and configure your environment as desired.
- Better security: You have more control over security and backups with an isolated server environment.
- Scalability: Scale up your resources as your site expands without having to switch hosting providers.
For those who require more flexibility and control than traditional WordPress hosting provides, VPS hosting is a good option that can scale with your website.
What Do You Need Before You Deploy WordPress?
Before you deploy WordPress, ensure that you have all the necessary items for the deployment. By preparing these things in advance, you can avoid any interruptions during the installation process.
- VPS server: Linux VPS that provides sufficient CPU, RAM and storage for your website.
- Ubuntu 24.04 LTS: a stable and widely used operating system that is suitable for WordPress.
- SSH access: To securely connect to and manage your VPS from the command line.
- Domain Name: So that visitors can visit your website via a custom web address.
- MySQL or MariaDB: A database to store your WordPress content, users and settings.
- Web server: Install Apache, Nginx, or LiteSpeed to serve your website.
How to Deploy WordPress on a VPS in 6 Steps
Step 1: Connect to Your VPS
Start by connecting to your VPS using SSH. Your hosting provider will usually share the server IP address, username, and login credentials after the VPS is created. Once connected, update your server packages so you’re working with the latest software before installing anything else.
Step 2: Install Your Web Server and PHP
Next, install a web server along with PHP, which WordPress needs to run.
- Apache is beginner-friendly and works well for most websites.
- Nginx is a good choice for handling high traffic with lower resource usage.
- LiteSpeed is built for speed and pairs well with the LiteSpeed Cache plugin for WordPress.
Whichever web server you choose, install a supported PHP version along with the required PHP extensions to ensure WordPress runs without compatibility issues.
Step 3: Create a WordPress Database
Every WordPress website needs a database to store posts, pages, user accounts, comments, and website settings. During this step, create a new WordPress database, then create a dedicated database user with a strong password. Finally, grant that user permission to access the database. Using separate credentials instead of the default database account adds an extra layer of security and makes future management easier.
Step 4: Install WordPress
Download the latest version of WordPress from the official website and extract the files into your web server’s document root. Next, rename the sample configuration file to wp-config.php and enter your database name, username, and password. Once WordPress is connected to the database, your website is ready for the web-based installation.
Step 5: Point Your Domain and Enable SSL
Update your domain’s DNS records to reflect your VPS IP address. Once the changes have propagated, install an SSL certificate to use HTTPS. This secures information shared between your site and visitors, boosts trust, and is suggested for all WordPress websites.
Step 6: Complete the WordPress Setup
Open your domain in a browser to launch the WordPress installation wizard. Create an administrator account with a strong password, set your website title, choose the correct timezone, and configure your permalink structure for clean, SEO-friendly URLs. Before publishing your website, install the latest WordPress updates to keep your site secure and running smoothly.
5 Simple Ways to Improve WordPress Performance on a VPS
A VPS offers more control over your hosting environment, but to get the best performance out of your WordPress website, you need to configure and maintain it properly. These are the 5 ways that will make a difference.
Enable Server-Side Caching:
Caching is the process of storing content that is accessed often, and this will make your website load faster and pages be generated faster.
Update PHP:
The most recent stable version of PHP will provide improved compatibility, security, and website speed.
Optimize WordPress database:
Remove unused data such as post revisions, spam comments, and expired transients to maintain a healthy WordPress database.
Use optimized and compressed images:
Large images can kill websites. Resize images before uploading and use current image formats (where possible) such as WebP.
Host static files from a CDN:
A Content Delivery Network (CDN) stores images, CSS and JavaScript on servers that are closer to your visitors, which helps to improve the loading time for users in different regions.
No one plugin can solve all speed issues. The best combination to get the best results is a properly configured VPS and proper WordPress practices, regular maintenance, and continuous performance monitoring.
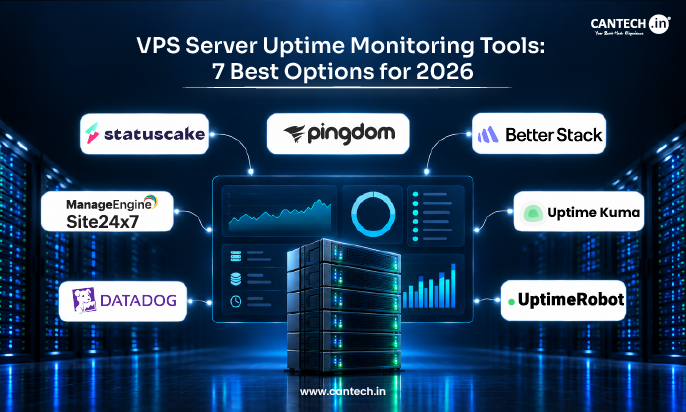
For practical ways to monitor availability and server health, see our guide to VPS server uptime monitoring tools.
Common Mistakes to Avoid When Hosting WordPress on a VPS
You have a lot of flexibility when you install WordPress on a VPS, but if you make a few mistakes during the installation, you may have issues later on. By keeping a few basic points in mind from the outset, you can avoid a lot of needless troubleshooting.
Weak database passwords: Always use a strong and unique password for your WordPress database. Using simple passwords makes it easier to get unauthorized access.
Not running the site with SSL:
Get an SSL certificate and ensure that your site is served via HTTPS. This encrypts data that is transmitted between your visitors and the site and also helps to prevent browser security warnings.
Not doing regular backups:
Automatically back up your website files and database. If the update does not go well, there is a problem with the server, or some important data is accidentally deleted, a recent backup can help you restore the site quickly.
For additional guidance on protecting your VPS data, follow these VPS backup best practices.
Too many plugins:
Each plugin requires additional code for WordPress to run. Only install the plugins you need and uninstall those that are not needed to avoid unnecessary overhead and security risks.
Failure to update software:
Ensure WordPress, PHP, plugins, themes and server packages are all current. Updates may contain critical bug fixes, security patches, and performance enhancements.
Use the default admin username:
Do not use a predictable username like admin for admin users. A less obvious username will provide an additional layer of protection against automated login attempts.
Conclusion
A VPS allows you to host WordPress and gives your website the resources, control and flexibility to outgrow shared hosting. Once WordPress is properly set up, keeping the server updated, secure and optimized will help keep things humming as your traffic grows.
If you want to manage the server yourself or get a managed server depends on your technical experience and how much time you want to spend on server maintenance. When it’s time to leap, Cantech VPS Hosting gives you a solid foundation to host, manage and scale your WordPress website as your needs change.
FAQs
Is VPS better than shared WordPress hosting?
Yes, a VPS will provide better performance, security and scalability over shared WordPress hosting because the server resources are not shared with other websites. It’s great for growing businesses, WooCommerce stores and sites with regular traffic.
How much RAM does WordPress need on a VPS?
A basic WordPress site can run on 2 GB of RAM, but business websites tend to perform better on 4 GB of RAM. If you have a high-traffic website, WooCommerce stores, or membership sites, it is recommended to have 8 GB RAM or more to ensure faster page loading speeds and smoother performance.
Does WordPress require a database?
Yes. WordPress needs a MySQL or MariaDB database to store the content of the website, user accounts, settings, themes, plugins and so on. When you install it, you will create a database and connect it to WordPress through the wp-config.php configuration file.