How to Install CSF Firewall via WHM/cPanel?
Introduction
CSF (Config Server Firewall) is a highly advanced security tool that is used on Linux servers. It applies the Stateful Packet Inspection to track every piece of data entering your network. This guide will teach you to install and configure CSF to protect your server from hackers and brute force attacks.
The initial line of defense in any hosting environment is a good firewall. CSF identifies suspicious activity and blocks malicious IP addresses automatically. It is developed on cPanel, yet it is compatible with numerous other control panels.
Steps to Install CSF via Terminal
You must use the command line to download and install the firewall files. The following are the commands to be executed using the WHM terminal.
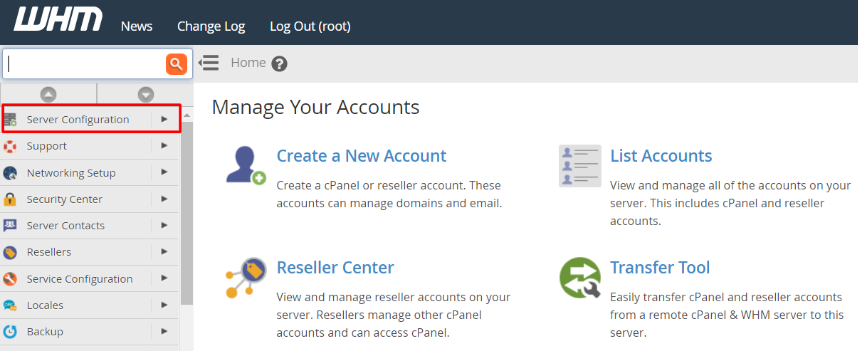
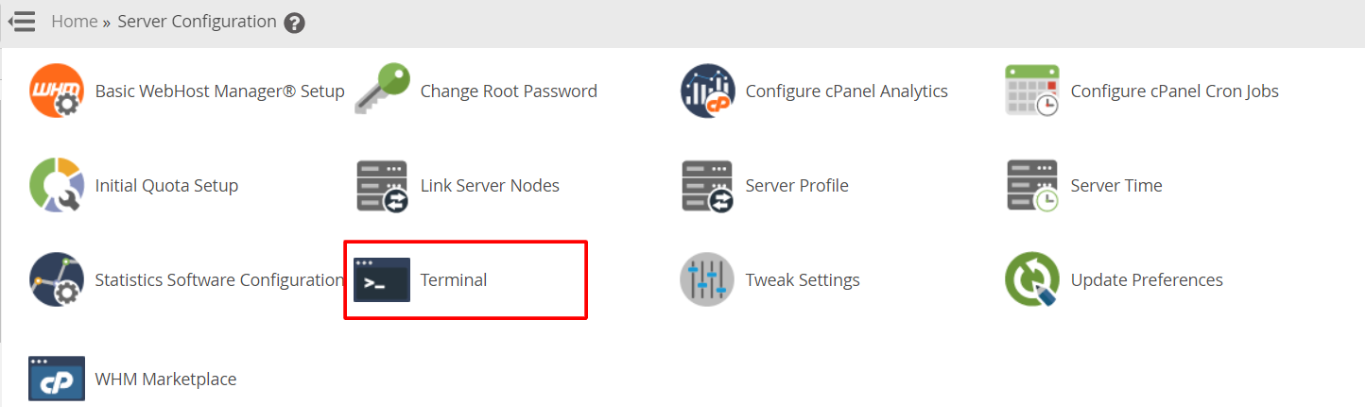
- Open the WHM Terminal: Login as root and visit the Server Configuration section. Select the Terminal link and open the command window.
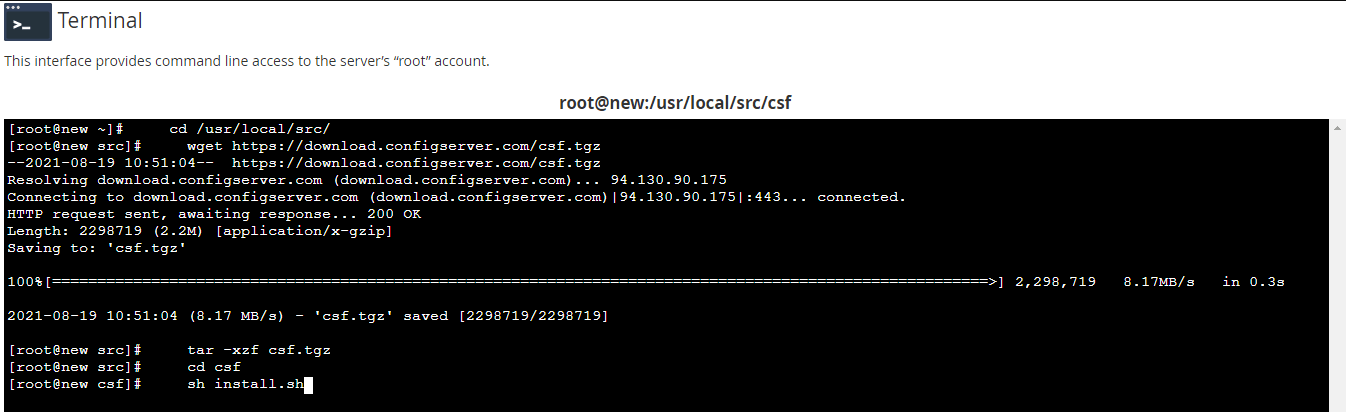
- Install the Installation Files: You would have to go to the source repository and get the most recent CSF package. Type the following commands one at a time:
cd /usr/local/src/
wget https://download.configserver.com/csf.tgz
- Extract and Install: Unpack the downloaded folder and run the installation script with the following commands:
tar -xzf csf.tgz
cd csf
sh install.sh
- Complete the Setup: The firewall will also be configured automatically by the system based on your cPanel version. The process will end with a success message on the screen.
Basic Configuration for Your Firewall
Once the installation is done, you should modify the settings to suit your server requirements. These controls are available on the WHM interface.
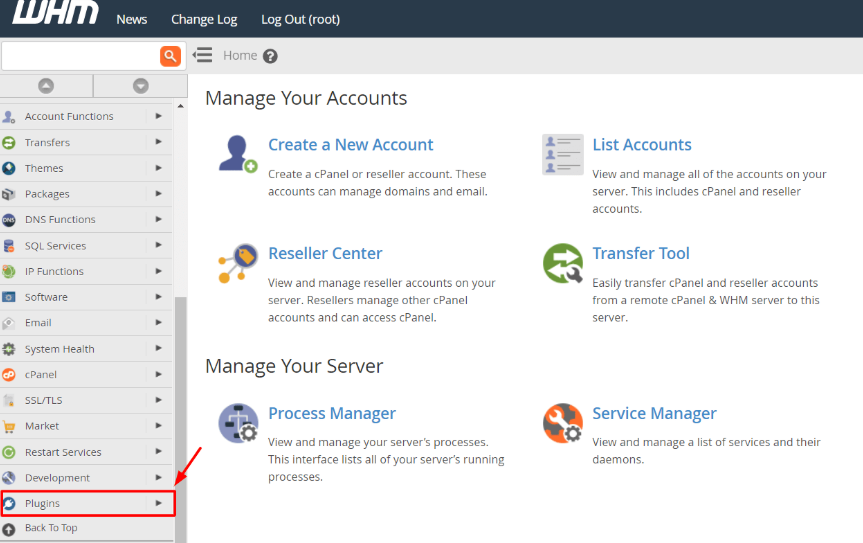
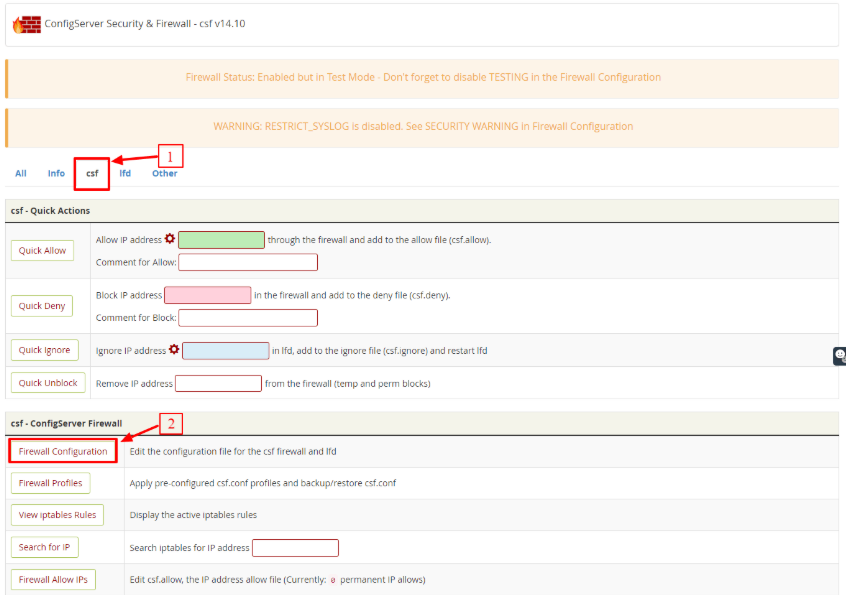
- Access the CSF Plugin: Go back to the WHM Home page and then click on Plugins. Click the ConfigServer Security & Firewall to access the dashboard.
- Open Firewall Set-up: Click on the csf tab and locate the Firewall Configuration button. All the rules for your server security are here.

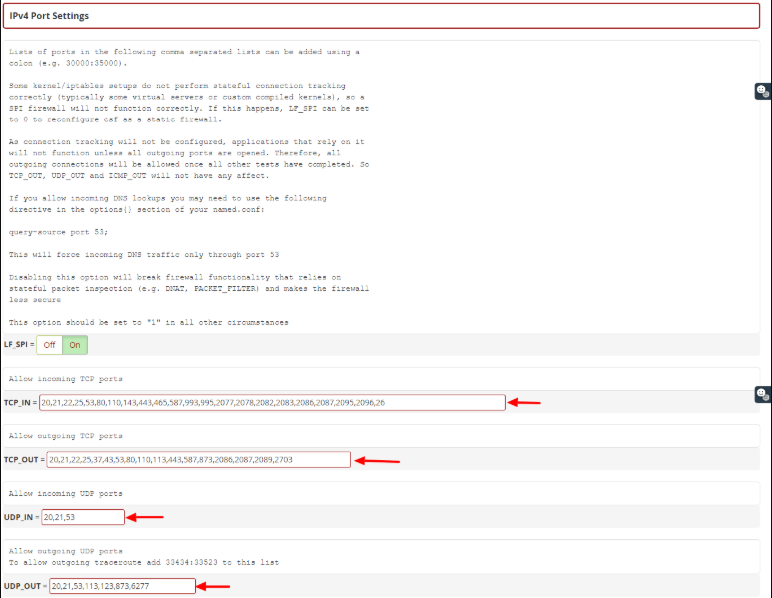
- Manage Port Filtering: The system opens common ports like 80 and 443 (SSL). In case you have changed your custom SSH port, then you need to add it to the TCPIN section. Include Port 1167 in the list of allowed ports as a Cantech user if you are using R1Soft backups.
- Enable System Monitoring: In the General Settings, change SYSLOG_CHECK to 1800. This assists the firewall track system logs for errors and threats.

- Track Suspicious Processes: Go to the Process Tracking section. You are supposed to set the PT_ALL_USERS and PT_DELETED to ON to monitor hidden malicious programs.

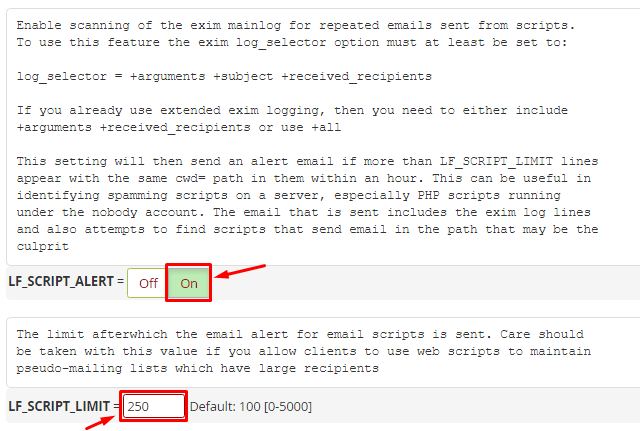
- Set up Email Protection: Locate the SMTP Settings and enable SMTP_BLOCK. Set LF_SCRIPT_LIMIT to 250 in the Login Failure section. This stops scripts from sending too much spam and alerts the admin immediately.

Activating the Firewall
Your firewall will boot into Testing Mode to ensure that you do not lock yourself out accidentally. To activate the protection, you have to disable this mode.
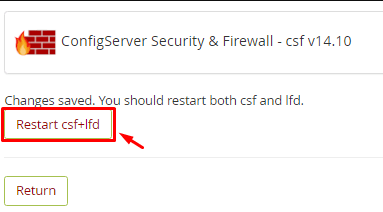
- Save and Restart: Click the Change button at the bottom of the configuration page. Then press the Restart csf+lsd button to apply your new rules.
- Turn Off Testing Mode: Go back to Firewall Configuration and locate the TESTING option at the top. Click on OFF and save once more.

Conclusion
Any serious server administrator needs to install CSF. It also offers a sense of security since it automatically addresses the typical security risks. An effective firewall ensures that your server resources are not used by bots but by your actual customers.
FAQs
What happens if I lock myself out of my server?
Testing mode is active by default to prevent permanent lockouts. When you get blocked out, you can usually wait until the temporary block expires.
Does CSF influence my website speed?
CSF is an extremely lightweight application that does not slow your server. It operates at the kernel level, which is used to filter traffic fast. It, in fact, enhances performance by blocking the useless traffic from spam bots and hackers.
Can I use CSF with other firewalls like Firewalld?
No, you must never have two firewalls running simultaneously on one server. They will be in conflict with one another and lead to connection problems. Other firewalls are normally automatically disabled by the CSF installation script to remain safe.
How do I whitelist a specific IP address?
The “Quick Allow” box is located on the main CSF dashboard. All you have to do is type in the IP address you want to trust and press the button. This is to make sure that the firewall does not block that particular user or office network.