How to Add Swap Moremy in Ubuntu 24.04?
Introduction
Your system can get slow when too many things are running. Also, your RAM could get full, and your computer starts facing performance issues. Ubuntu 24.04 uses a smart method of creating a small area on your hard disk and using it like virtual memory. This is called Swap memory. It gives extra breathing space.
Moreover, this part of the disk works like backup RAM. The system moves less important data there so that important tasks can run smoothly in RAM.
All in all, Swap memory makes your system stay stable even when heavy apps are running. Also, it prevents your machine from freezing or crashing. You get support in multitasking or running demanding software.
Ubuntu 24.04 can manage this memory more efficiently than before. It makes the system work better even if your computer has less RAM. This is very helpful for people who use older or low-end machines.
In some cases, you may want to use extra storage to increase swap memory in Ubuntu. You can also create a separate file to use as swap memory for more flexibility and improved performance.
Let’s learn how to check, create, activate and manage swap memory step by step.
What You Need Before Starting
Make sure your server is ready with Ubuntu 24.04 installed. Also, you can attach a Block Storage volume if you want to use it.
Log in to your VPS Ubuntu server with a non-root user who has sudo access.
Check Current Swap Memory
Your server might already be using some swap. To find out how much, run this command.
sudo free -h
This will show your RAM and swap usage. If you see very little swap or no swap at all, then you may need to add more.

Option 1: Create Swap Using a Swapfile
This method works well if you don’t want to touch your block storage volume.
- Use your server’s existing storage by creating a swapfile. Run this command to make a
2GBswapfile:sudo fallocate -l 2G /swapfile.img
- Now, set the correct permissions for this file so that only root can use it:
sudo chmod 0600 /swapfile.img
- Next, format this file to make it usable as swap:
sudo mkswap /swapfile.img
After this, the system will tell you that swap space has been created. It will also show the file’s UUID. You can keep this UUID safe for later use in mounting.
Output:
Setting up swapspace version 1, size = 2 GiB (2147483648 bytes)
no label, UUID=ef2befab-35b6-4747-94a3-35a4ceced946
- Now you can activate the swap file:
sudo swapon /swapfile.img
- This command tells the system to start using this file as swap memory.
- Check if the new swap is working using:
sudo swapon -s
- In Ubuntu, you will see the swap file listed in the
outputif the swap file Ubuntu is active.Filename Type Size Used /swapfile file 2097148 90148 /swapfile.img file 1048572 0
Option 2: Create Swap with Block Storage
You can use a block storage volume attached to your server for swap instead.
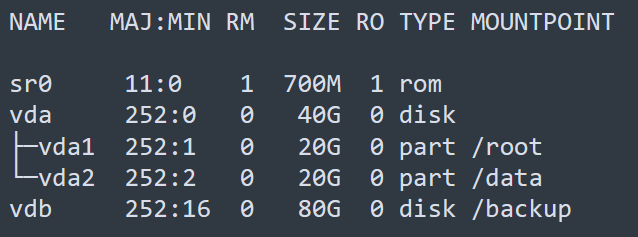
- First, check all attached disks:
lsblk
- Look for a new device like
/dev/vdb. It should show up without any partitions if it is unused. That will be your block storage.
- Now, initialise the volume with a GPT partition table:
sudo parted -s /dev/vdb mklabel gpt
- Create a partition using the full storage:
sudo parted -s /dev/vdb unit mib mkpart primary 0% 100%
- Check again with lsblk and confirm that /dev/vdb1 is now available.
- Convert it into a swap with this command:
sudo mkswap /dev/vdb1
The system will show that swap has been set up on this partition, and it will also display the UUID. Save this UUID because we will need it later for automatic mounting..
Turn On Swap Memory
- To activate the swapfile, use:
sudo swapon /swapfile.img
- To turn on the block storage swap partition, you can run the commands used in Ubuntu create swap partition:
sudo swapon /dev/vdb1
- You can now check if the swap is active by running:
sudo swapon -s
- This will confirm that your block device is now working as swap memory. You should see the list of swap files and partitions in use.
Filename Type Size Used /swapfile file 2097148 90148 /swapfile.img file 1048572 0 /dev/vdb1 partition 1184257 0
Make Swap Permanent with fstab (File System Table)
Now we come to an important step. If you don’t do this, the swap memory will go away every time you restart the server.
To make your swap permanent, you have to edit the fstab file. This file tells your system what to mount when it starts up.
- First, take a backup just in case:
sudo cp /etc/fstab /etc/fstab.bak
- Now open the file:
sudo nano /etc/fstab
- Add this line at the end for the swapfile:
/swapfile.img swap swap defaults 0 0
Let’s break down what this line means:
/swapfile.imgis the path to the file you created.- The first
swapsays that it is a swap type of file system. - The second
swaptells the system to mount it as swap. - The word
defaultsapplies normal mount settings. - The two zeros are used for backup and file checks. These are not needed for swap, so they are both set to 0.
- For the block storage, get the
UUIDfirst:blkid
- Find the UUID for /dev/vdb1 and add a line like this to your fstab:
UUID=your-uuid-here swap swap sw 0 0
- Replace your-uuid-here with the actual UUID you saw from blkid.
- Save and close the file.
Adjust Swappiness Value
Swappiness tells your system when to start using swap memory. A lower value means the swap is used less often. Ubuntu decides how often it should use swap memory using a setting called swappiness. It is a number between 0 and 100.
- A value of 0 means the system will almost never use swap.
- A value around 30 to 50 is balanced and works well for most users.
- A value of 100 means the system will use swap very frequently.
Choose what suits your work style. If your RAM is small, a value like 60 can help you avoid crashes. If your RAM is big, a lower value like 20 may be better for speed.
To set swappiness to 50 in the system configuration, run:
echo "vm.swappiness = 50" | sudo tee -a /etc/sysctl.conf
Output:
vm.swappiness = 50
Then reload the settings:
sudo sysctl -p
This setting controls how smartly your server switches between RAM and swap, depending on the workload.
Test If Swap is Working
You can use the following commands to test your swap configuration.
- Check all active swap areas using:
sudo swapon -s
Output:
Filename                                Type            Size           Used
/swapfile                                  file            2097148    90148
/swapfile.img                           file            1048572    0
/dev/vdb1                                partition   1184257    0
- If anything is missing, activate everything in your fstab file with:
sudo swapon -a
- You can also run this to view the current memory and swap status:
sudo free -h
Output:
                     total        used        free      shared  buff/cache   available
Mem:           3.8G        1.2G        1.9G        112M        720M        2.3G
Swap:          2.0G          0B          2.0G
Turn On All Inactive Swaps From fstab
You edited /etc/fstab but forgot to turn on the swap manually, then use this to activate all swap entries:
sudo swapon -a
This reads your fstab and enables all swap entries that were saved there.
Disable Swap If Needed
If you ever want to remove the swap file or swap partition Ubuntu, you must first disable it.
- To turn off a swap file:
sudo swapoff /swapfile
- Or for block storage:
sudo swapoff /dev/vdb1
Then go to your /etc/fstab file and remove the line you added for swap. That will stop the system from trying to mount it after reboot.
Conclusion
Ubuntu swap memory acts like an extra safety net for your system. It keeps things running even when RAM becomes full. It may be slower than RAM, but it still helps your server stay responsive under load. With Ubuntu 24.04, you can easily manage swap using simple tools and commands.