How to Enable/Disable PHP Extensions via Plesk?
Store owners are constantly searching for alternatives that can narrow down their work and improve productivity. For the proper functioning of the online store, having the perfect set of extensions is crucial that can enhance stability, security and performance. PHP extensions play a key role in improving the functionality of your website or application.
Plesk is a robust web hosting panel that makes it flexible enough to manage PHP extensions at ease. You might require managing complex configurations to enable/disable PHP extensions. On the other hand, Plesk offers an easy-to-use interface to enable/disable PHP extensions as needed without any technical knowledge.
Here, in this guide, we’ll walk you through the steps to enable/disable the PHP extensions via Plesk!
Why Do You Require to Enable/Disable PHP Extensions?
There are plenty of reasons where it is essential to manage PHP extensions. Let’s have a look!
Application Requirements: Based on the CMS used, they might require certain specific extensions to run. For instance, let’s say Laravel, will require their particular extensions.
Performance: Disabling the extensions that aren’t required might save money and help enhance the server’s performance.
Security: Certain extensions can cause security issues if they aren’t appropriately managed. By disabling such extensions, it helps reduce the chances of fraudulent activities.
Version Changes: With the latest PHP versions, there are chances that some extensions can depreciate or might replace the equivalent extensions. This can be done so by enabling or disabling the PHP extensions.
Pre-requisites to Know
To enable/disable the extension via Plesk, you require the following!
- One must have access to the Plesk admin panel along with the required permissions.
- Detailed idea about the application or domain for extension integration.
- A detailed idea about the PHP version.
- Make sure that you’ve the proper backup of your website.
Steps to Enable or Disable PHP Extensions in Plesk
Here is a list of a few basic steps for enabling or disabling PHP extensions in Plesk!
Step 1:
Move to the Plesk admin panel. Add the username and password required to login to the admin panel.
Step 2:
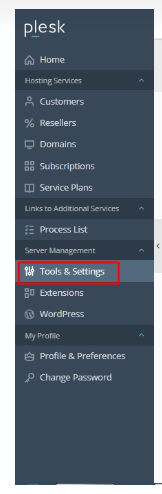
Go to the Tools and Settings option from the navigation menu.
Step 3:
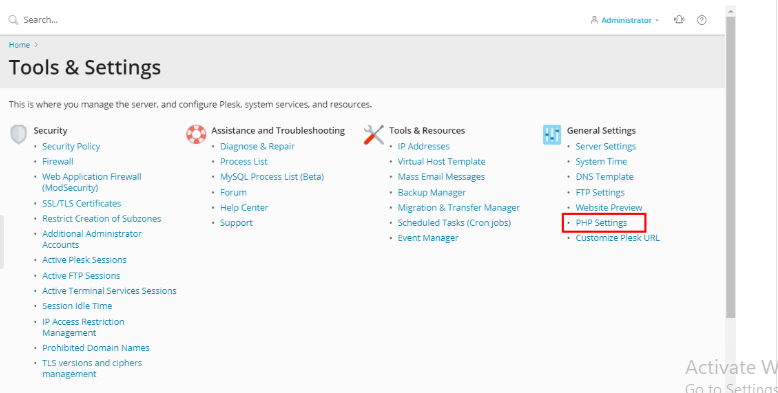
Then, go to General Settings > PHP Settings.
Step 4:
Once after clicking PHP settings, it will display a list of all the available PHP versions.
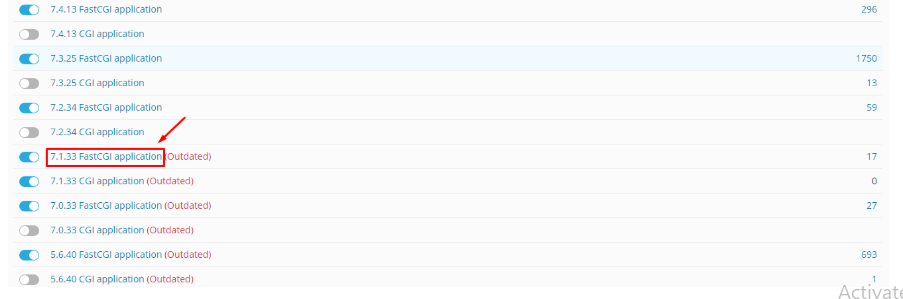
Step 5:
Click on the PHP version, and it will show the list of all the PHP extensions. Then, you simply need to tick the extensions that you want to enable and untick the extensions that you want to disable.
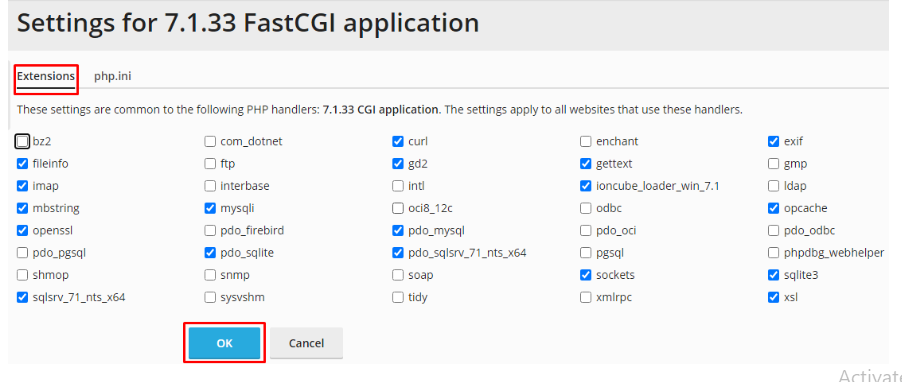
Once you’re done, simply click “Ok”.
That’s it!
As a result, all the extensions will be enabled and disabled based on the configurations!
Final Wrap Up
PHP extensions act as a cornerstone for almost all applications. It makes enabling and disabling the extensions easier. Hence, Plesk will ensure that your online store keeps running smoothly.
As a result, it is essential to check the need for PHP extensions and ensure the seamless functioning of your store or application.
Frequently Asked Questions
Is it possible that running too many extensions can slow down my website?
Yes, the chances are high that running multiple extensions can affect the performance of my website.
Does disabling certain extensions affect my website?
Moreover, it specifically relies on the need for an extension for your website. If it is dependent, it could lead to causing errors.