How to Set up CronJobs in cPanel?
Cron is a task scheduler that is built into the Linux operating system. It is highly flexible and lets you schedule all kinds of automated tasks. The cPanel cron jobs icon in the advanced section of cPanel offers a simple graphical interface to use this beneficial feature. In this article, we explain a step by step process to help you set up cron jobs.
Steps to set up CRON Jobs
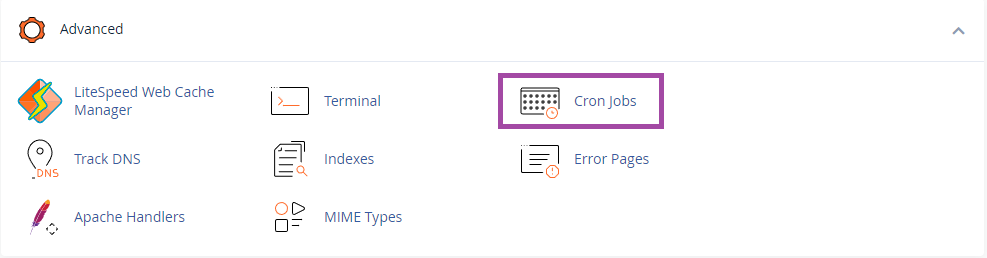
Step 1: Go to cPanel, proceed to the advanced section and then select cron Jobs.
Step 2: Updating cron email
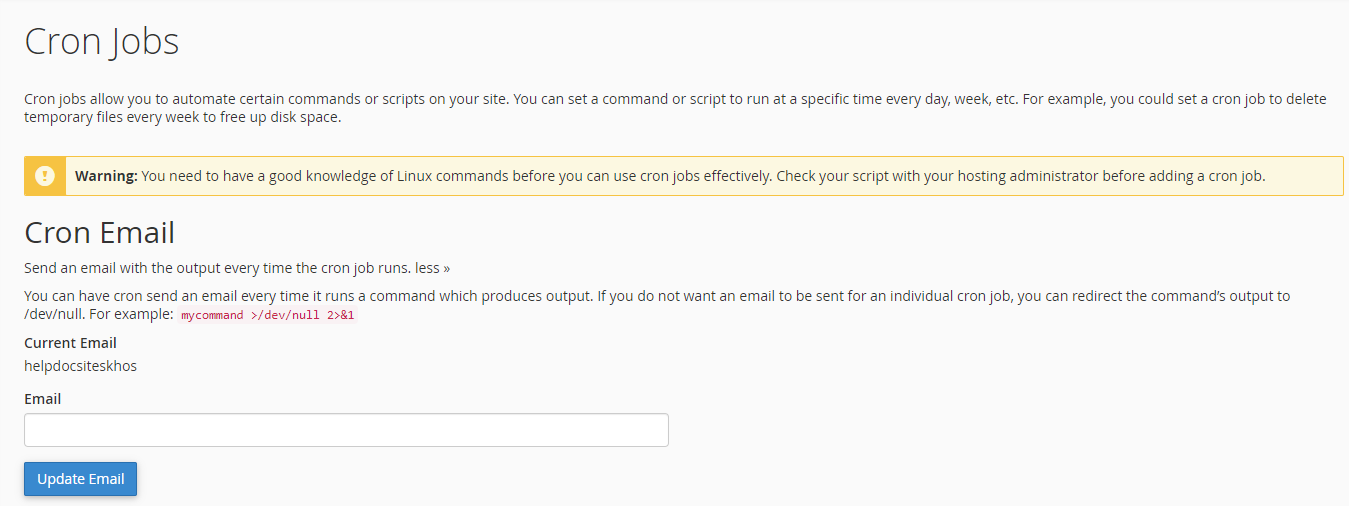
Email notifications for cron jobs are going to be sent to the account’s default email address.
You can update or change this in the upper section of the Cron Jobs screen:
Just enter in the email address you would like cron notifications sent to and click Update Email.
Step 3: Adding a cron job
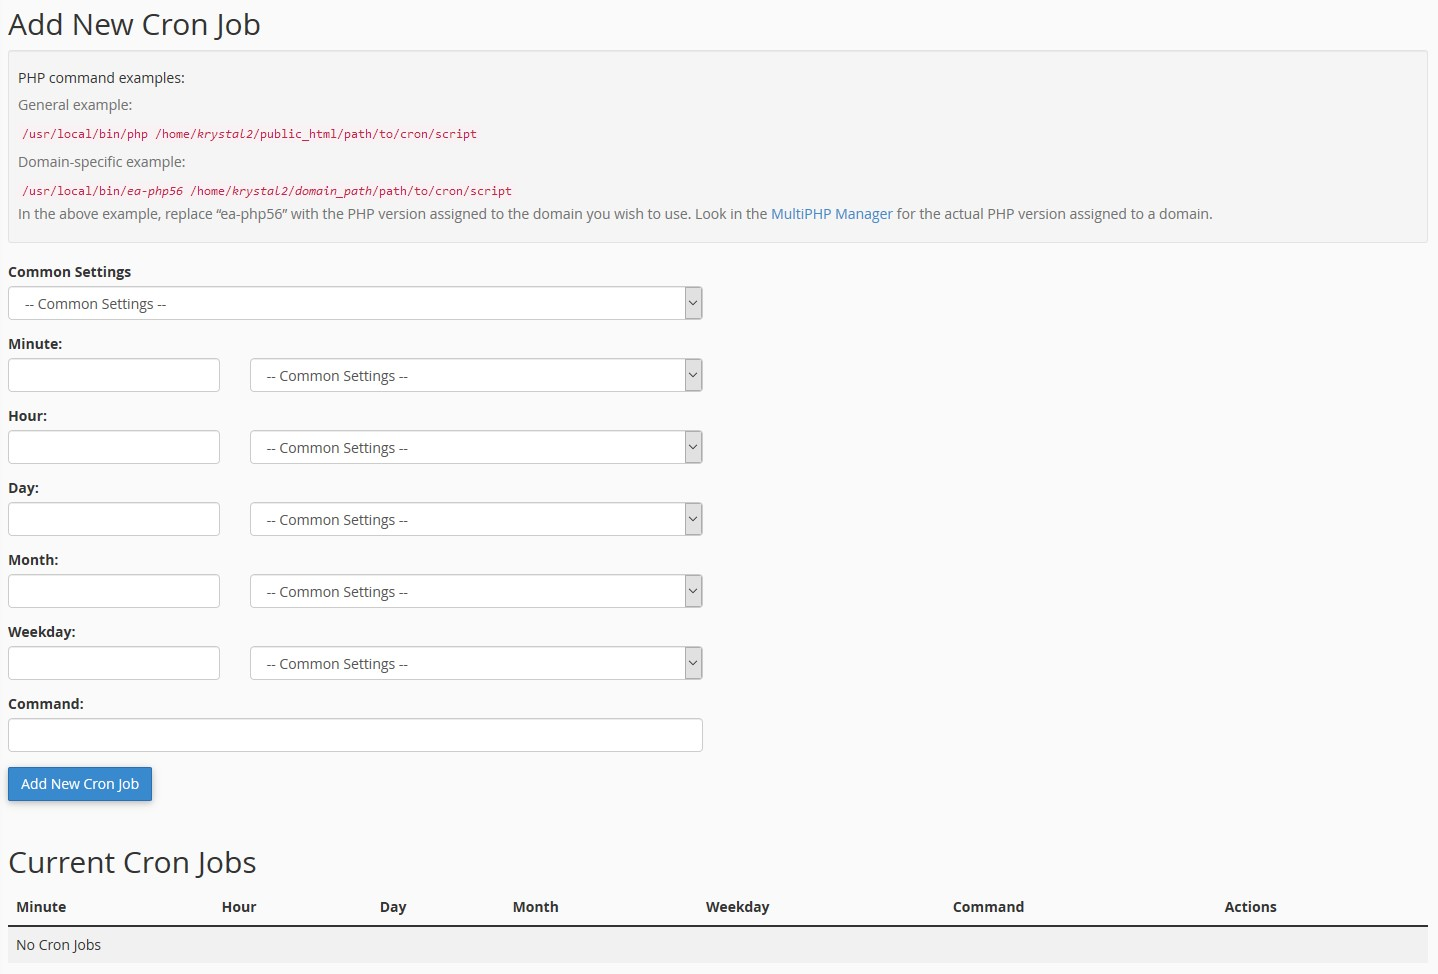
You have to add settings to cron on how often to run this task, where you can select from common settings, to enter all the details or for more specific control. Choose your own settings for a minute, hour, day, month and weekday.
Step 4: Edit or Delete a Cron Job
If you want to edit or delete one or more of your cron jobs. You need to:
Scroll down to the Current Cron Jobs section;
Click the Edit or Delete link. Edit pop up the cron job settings;
Edit Cron Jobs in cPanel
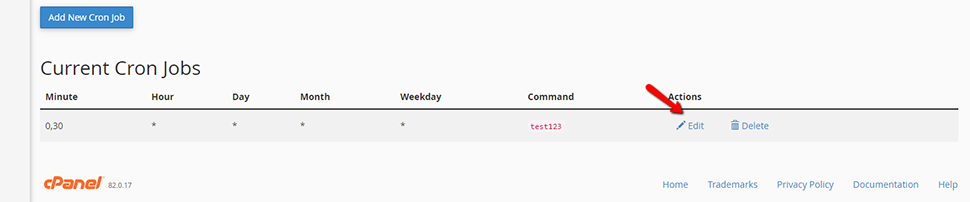
Make all the necessary changes you want and then click the edit line button:
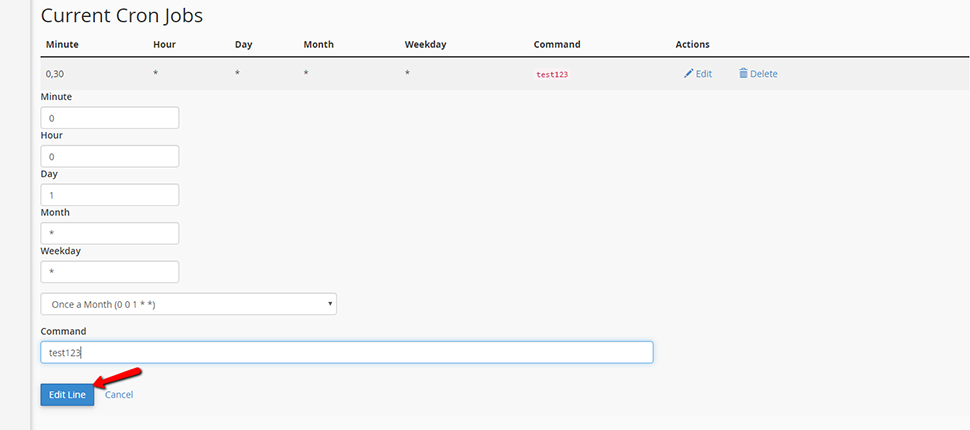
Edit Line for Cron Jobs
Delete opens a delete dialog. Then click the delete button:

Delete Cron Job in cPanel.
Conclusion
Setting up cron jobs through cPanel is quite an easy and simple process. If you find that cron jobs are beneficial to you, you need to start thinking about other uses for them.
