How to manually renew a Let’s Encrypt certificate in Plesk?
Internet Security Research Group runs a non-profit and automated certificate authority called Let’s Encrypt. They also provide X.509 certificates for Transport Layer Security encryption for free. Let’s Encrypt allows you to install a free, trusted SSL certificate on the website and enjoy the benefits of enhanced security. A self-signed SSL certificate is also free and secure but not yet verified, whereas Let’s Encrypt certificate is a fully verified and recognized certificate, which also displays the padlock icon in the address bar of web browsers.
A plugin in Plesk allows you to manage Let’s Encrypt SSL certificates.
# Steps to install Let’s Encrypt SSL Certificate on Your Domain
1. Log in to Plesk.
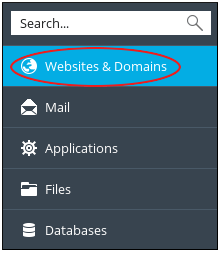
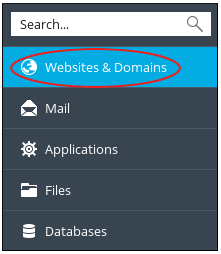
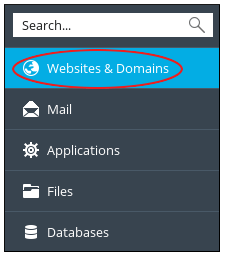
2. In the left sidebar of the Plesk home screen, click on Websites & Domains.
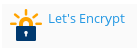
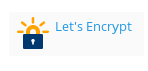
3. Click on the Let’s Encrypt icon.
Or
4. After Step 1. – click on Extensions menu item, and then click on the Extensions Catalog button.
Note: If you are using the Service Provider view, then Extensions is present under the Server Management menu item.
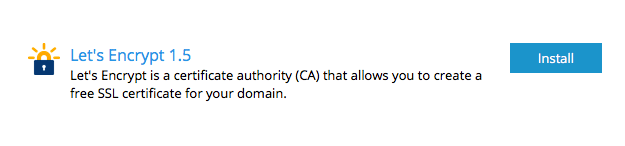
5. Now in the Extensions Catalog, click on the Install button which is next to Let’s Encrypt in-order to install the extension.
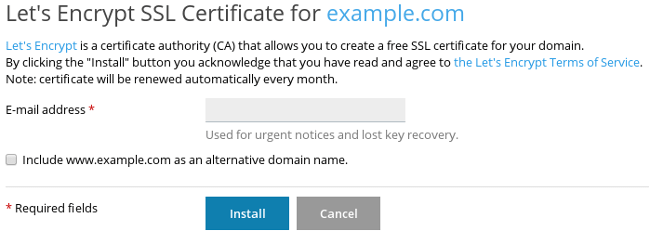
6. Enter valid e-mail address in the E-mail address text box.
7. If you want the SSL certificate to protect your domain with and without www prefix then select the Include www.example.com as an alternative domain name checkbox.
8. Click on Install. Once the installation gets complete you will get a Let’s Encrypt SSL certificate that was successfully installed on example.com message.
9. To the left sidebar of the panel, click on Websites & Domains.
10. Click on Hosting Settings.
11. Confirm that SSL support box is selected under the Security. And select Let’s Encrypt SSL certificate in the Certificate list box.
# How to review Let’s Encrypt SSL certificate for your domain?
Plesk automatically renews Let’s Encrypt certificates. By default, these certificates are valid for 90 days. Also, as recommended by the Let’s Encrypt developers, Plesk automatically renews certificates once in a month.
Perform the following steps to renew the certificate manually:
1. Log in to Plesk.
2. In the left sidebar of Plesk, click on Websites & Domains.
3. Click on the Let’s Encrypt icon.
4. Click on Renew.
And your certificate will get renewed.
Activating Let’s Encrypt in Plesk is one of the simplest yet most impactful upgrades you can make to your hosting environment. While the manual activation provides immediate protection, the real value lies in Plesk’s ability to handle the 90-day renewal cycle automatically, ensuring your site remains secure without constant administrative oversight. As a final best practice, always verify that your domain is correctly pointed to your server’s IP address before attempting activation, as Let’s Encrypt requires a successful DNS check to issue your certificate. With your SSL successfully installed, you can now enjoy the benefits of encrypted traffic, a professional padlock icon, and improved SEO performance.