How to Install WordPress Using Toolkit Plugin?
Introduction
The WordPress Toolkit in your control panel is a very powerful assistant for these tasks. It consolidates all the key settings in a single dashboard so they become easily accessible.
What is WordPress Toolkit in cPanel?
It is an all-inclusive management tool that is built into your hosting account. You may install new websites with it or locate the existing ones through the Scan button. It takes care of the simplest theme installs to the most complex site cloning and security inspections. You do not have to log into each site individually to do basic maintenance.
Key New User Features
The toolkit offers numerous features that will save you time and ensure the safety of your data. These are the options that you should explore to understand how to manage your network better.
Direct Installation
The toolkit interface allows you to create a new site, a new theme, or a particular plugin. This avoids the need for manual file uploads or FTP connections.
Security and Backups
The system has built-in security scans that look for weak points in your site code. You can also set up instant backups or restore your site to a previous version in case something goes wrong.
Installation of WordPress through Toolkit
The process of installation is extremely easy and can be completed within a few minutes. Please follow these steps to launch your new website.
Step 1: Go to Toolkit
You first need to enter your main hosting account to find the management tools.
- Enter your username and password in the cPanel account.
- Search for Applications or Domains section on the home page.
- Click WordPress Toolkit icon to access the main dashboard.
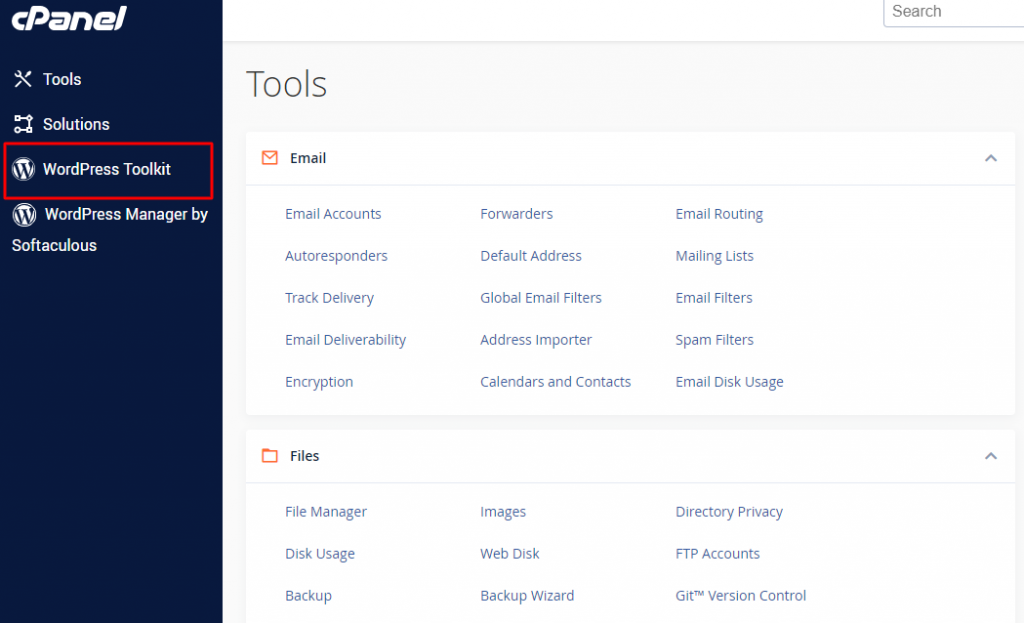
Step 2: Begin the Installation
When you are inside the toolkit, you can start the set up process of a new site.
- Click on the blue Install WordPress button at the top.
- A new page will open with several blank fields for your site details.
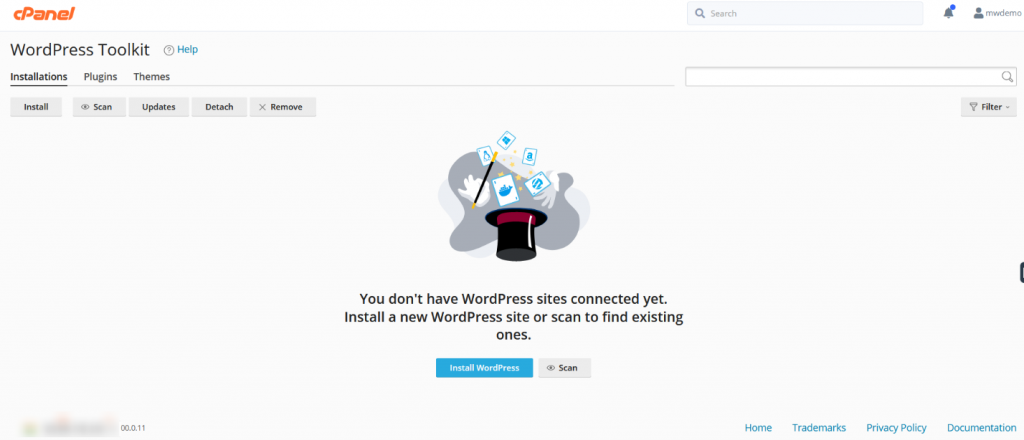
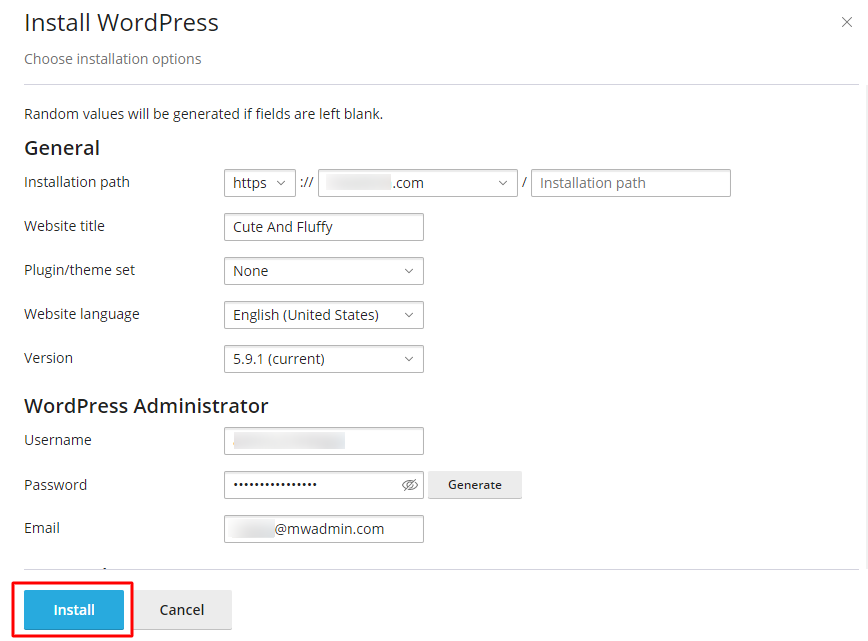
Step 3: Enter Your Website Information
You will be required to enter certain details in order to have your site built properly by the system.
- Installation Path: Choose the domain and the folder where the site is going to live.
- Website Title: Enter the name of your new business or blog.
- Plugin/Theme Set: Select a set of tools that you would like to install automatically.
- Language and Version: Choose your favorite language and the most recent software version.
- Admin Details: Use a secure username and a strong password to log in.
- Database Info: Type in the name of your MySQL database or allow the system to create one.
- Clicking the Install button will complete the setup.
Improving Your Website Security
Site setup is just the first portion of the task. You should also ensure that your files are protected against external attacks with the built-in security package.
Step 4: Perform a Security Check
The toolkit will also provide a security option once the installation is completed.
- In the toolkit dashboard, click the Security tab.

2. Click on Check Security button to scan your settings.
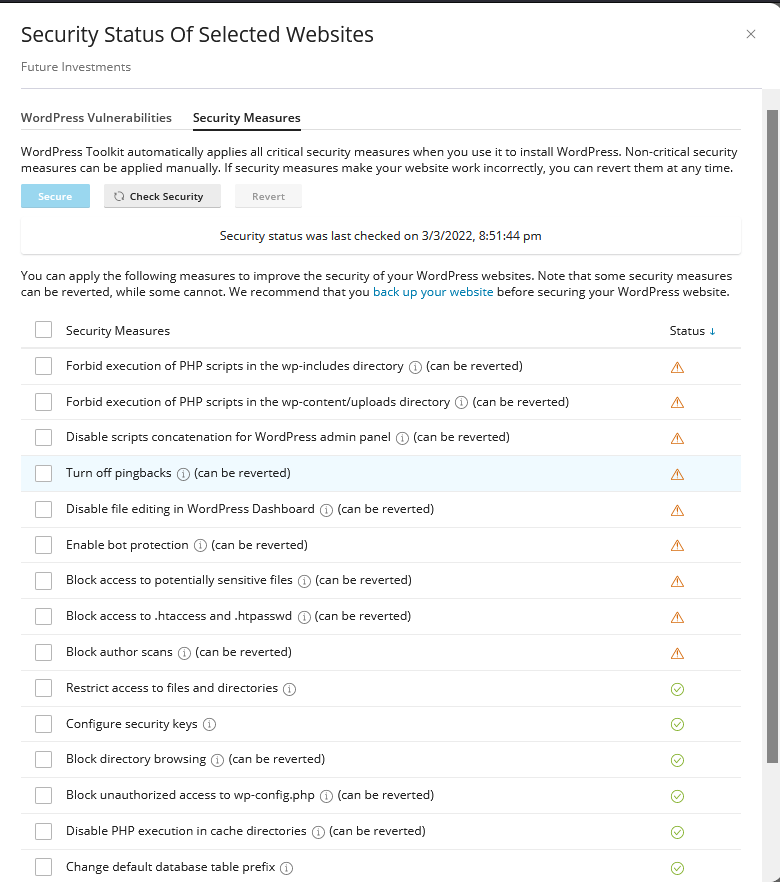
3. Review the list of suggested fixes that come on your screen.
Step 5: Fix Vulnerabilities
Your site’s safety may have holes due to older files or bad plugins. The toolkit assists you to locate and fix these problems in real time.
- Find the Vulnerabilities section in the security menu.
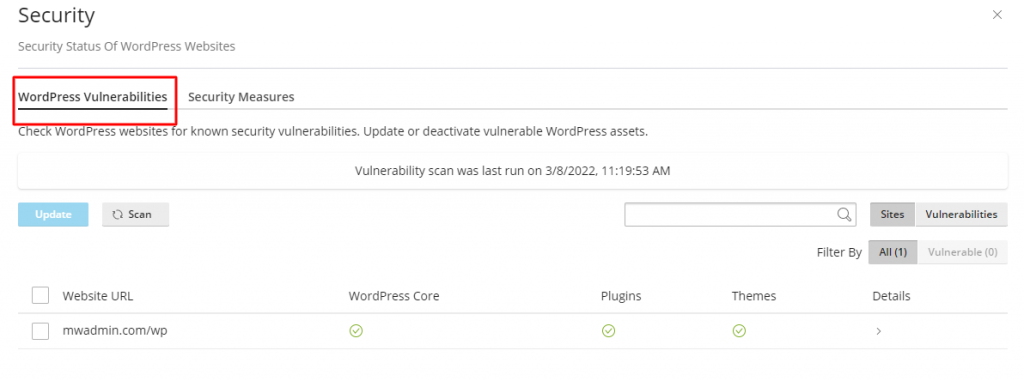
2. Identify any risky core files or plugins.
3. Use the repair button to update these files or add extra layers of protection.
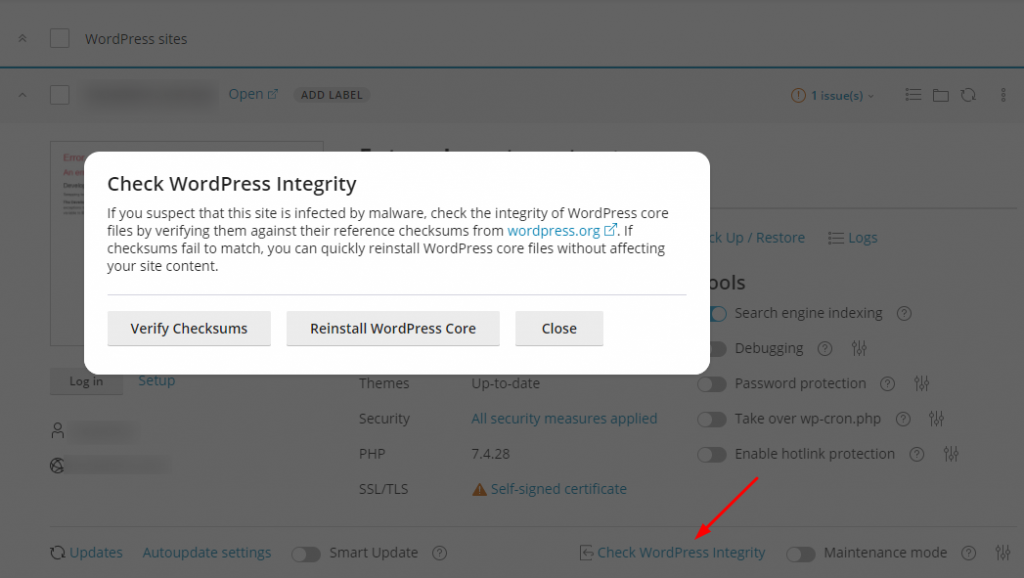
4. Import your existing sites to this toolkit to clean them from malicious code.
Cantech Management Benefits
Cantech hosting solutions will come with the entire WordPress Toolkit to simplify your life. Our servers are also optimised to handle the scanning and cloning features without reducing your site speed. You have a safe environment where automatic updates are done in the background. We have an excellent support team that is always available to assist you in transferring your old sites into the toolkit for better management.
Conclusion
WordPress Toolkit is the most appropriate tool to manage your websites from a single location. It makes the process of installation easier and keeps your security settings up to date. These measures will keep your site clean and performs well for your visitors. These are powerful built-in tools that can help you take control of your online presence.
Frequently Asked Questions
1. Can I manage sites that I installed manually?
Yes, you may use the Scan button in the toolkit to locate any WordPress site on your account. When the scan is done, all the toolkit features can be used on those sites. It works even if you did not use the toolkit for the original install.
2. What is a Plugin/Theme Set?
It is a set of tools that you prefer to use on all websites. You can make your own set, which will contain your favorite SEO or security plugins. The toolkit will then install all of them simultaneously every time you start a new site.
3. Does cloning a site create a new database?
Yes, the toolkit will automatically create a new database and copies all your content to it. It is an excellent method to make a staging site for testing new designs. Your changes can be tested without impacting your live site.
4. How can I upgrade the WordPress core using the toolkit?
Whenever a new version is available, it is indicated in the toolkit. You can click the update button directly from the dashboard. Another option is to configure the toolkit to install minor security updates automatically.
5. Will the toolkit be compatible with a different hosting panel?
This specific toolkit is designed for cPanel and Plesk environments. When your hosting is based on a custom panel, then you may have other tools available. Cantech uses standard panels in order to ensure that you can constantly utilize these convenient features.
