How to Install an SSL Certificate Using “SSL It!” Extension on Plesk?
Quick Answer Box
To install an SSL certificate with the help of the SSL It! extension, log in to the Plesk interface, go to Websites & Domains, select the needed domain, open the SSL/TLS Certificates section, choose SSL It! and click Get it free or Install to install the certificate.
Introduction
Securing your website with HTTPS is essential for being secure online and for SEO purposes. If you are using the Plesk platform as your web server, then you are in luck. The SSL It! extension allows you to auto-install an SSL certificate in just a few clicks. This extension handles the tedious tasks of requesting and installing your certificate, all you have to do is select an option and install! In the following tutorial, I will show you how to install an SSL certificate using the SSL It! extension on the Plesk platform.
Plesk provides you with the ability to install both free and premium SSL/TLS certificates, which may be obtained using Let’s Encrypt “SSL It!” extension. This article describes how to manually secure your domain with a Let’s Encrypt certificate provided by Plesk.
Steps to Install an SSL Certificate
Below are the steps to install an SSL Certificate:
Step 1: Access SSL/TLS Certificates
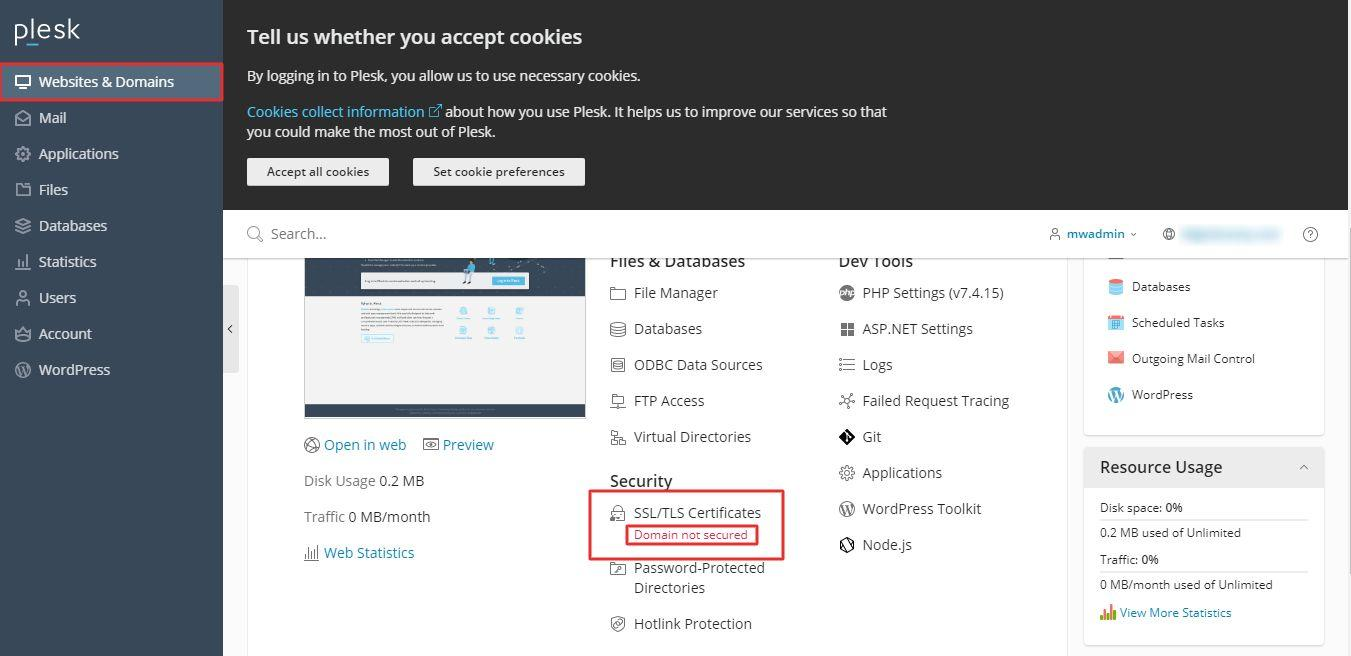
Log in to your Plesk account, then go to Websites and Domains and click SSL/TLS Certificates.
SSL/TLS Certificates menu
Note: You may see the status of “Domain not secured” in the SSL/TLS Certificates section.
Step 2: Initiate Free Certificate RequestClick “Get it free”, which opens the Let’s Encrypt certificate installation window.
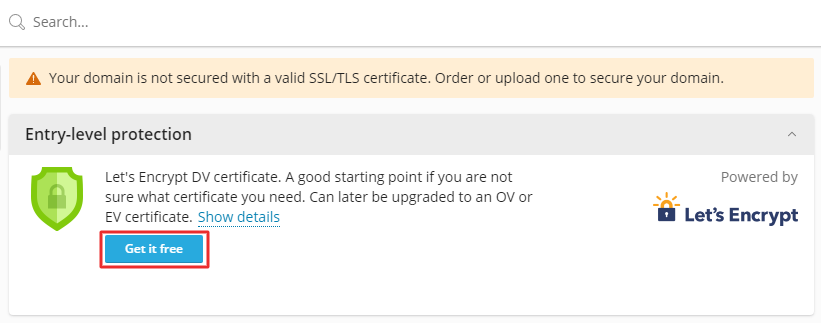
Get it free button
Step 3: Configure Certificate Options
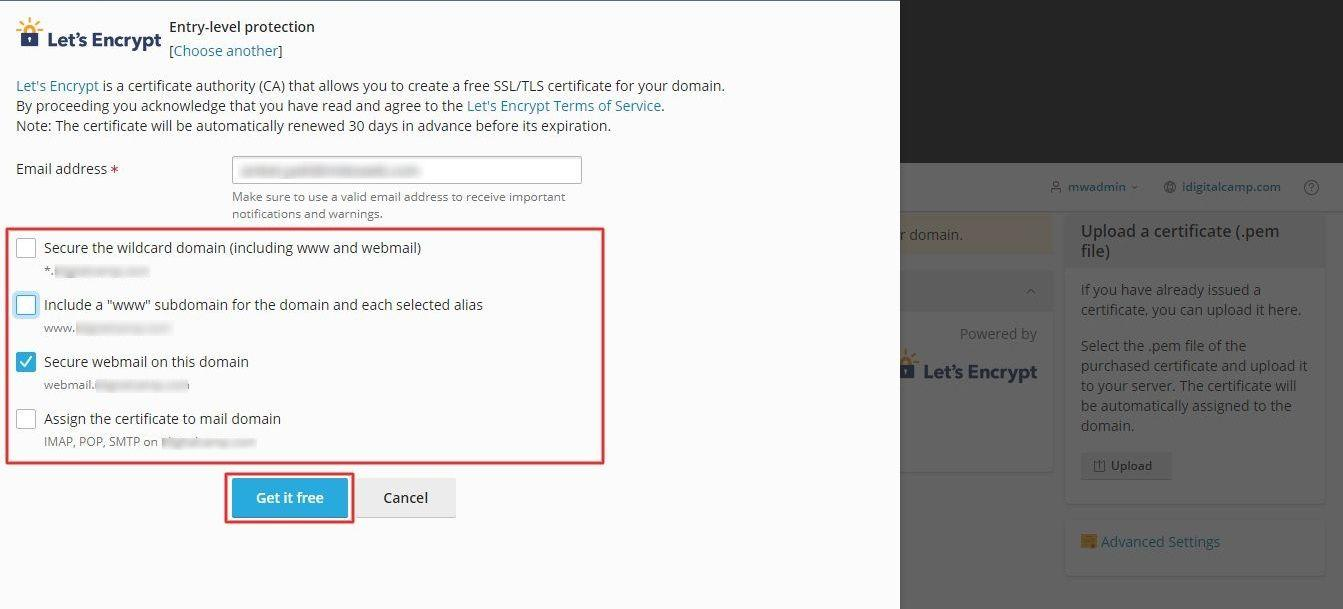
In the Let’s Encrypt SSL certification window, type in an email address to receive notifications and lost-key recovery instructions.
Choose what to secure in addition to the main domain:
Wildcard Domain: one or more subdomains
“www” subdomain and selected domain aliases
Webmail on the main domain
IMAP, POP, SMTP mail domains
Select the desired options and click the “Get it free” button.
Certificate configuration options
Step 4: Verify Installation
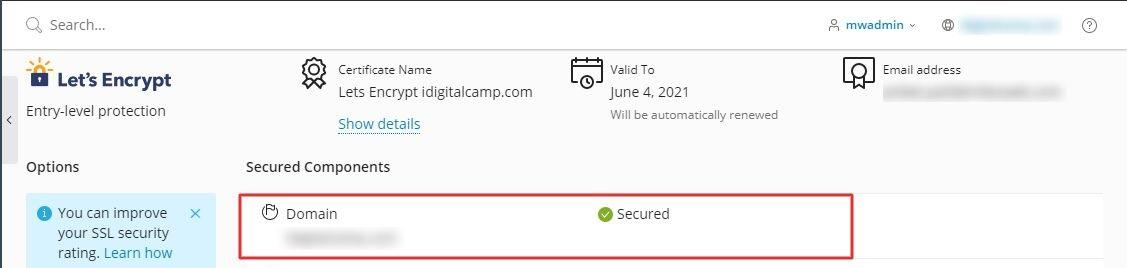
Let’s Encrypt will automatically generate and install an SSL/TLS certificate. When this process is finished, go to the SSL/TLS Certificates section again and check the list of Secured Components. Your domain will now be marked as secured.
Conclusion
Installing an SSL certificate is no longer a hassle! With a new chrome extension called “SSL It!”, you can now secure domains in Plesk with a few button clicks. There is no need to fiddle around with certificate requesting and private key generation. And, because domains come with auto-renewing certificates, there’s no need to be on top of the expiring dates either. Securing your website with HTTPS not only keeps your data safe, but also gives your site more credibility and better SEO. Spend a few minutes reading and implementing this guide, and feel free to offer your visitors and customers a secured environment which will keep their data right with them!
