How to Generate CSR and Private Key Using Plesk Panel?
A Certificate Signing Request (CSR) is a block of encoded text that contains the information needed by a Certificate Authority (CA) to authenticate your domain and issue an SSL certificate. In Plesk the CSR and Private Key are created at the same time. This is so that the cryptographic pair are guaranteed to match, which is necessary for the encryption to work properly when the certificate is installed.
This guide will outline the steps necessary to accomplish this using the Plesk Obsidian and Onyx interfaces. This is the safest way to ensure that the Private Key is kept within your server from the time of creation until you need to install it.
To Generate CSR and Private Key in Plesk
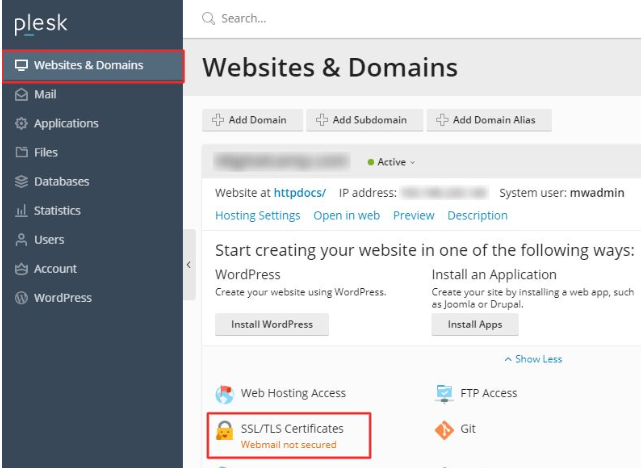
1. Sign in to the Plesk account.
2. In Websites & Domains click SSL/TLS Certificates.
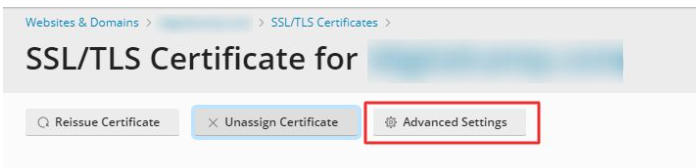
3. Click Advanced Settings.
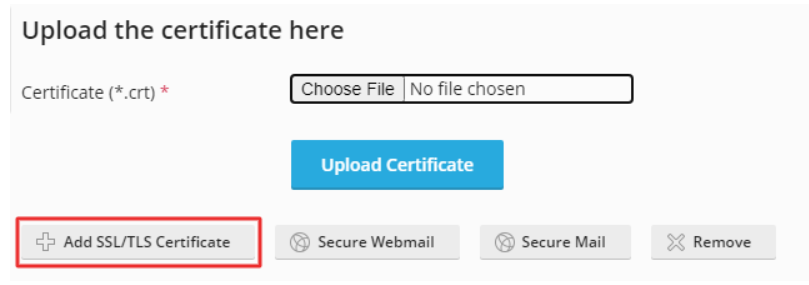
4. Click Add SSL/TLS Certificate.
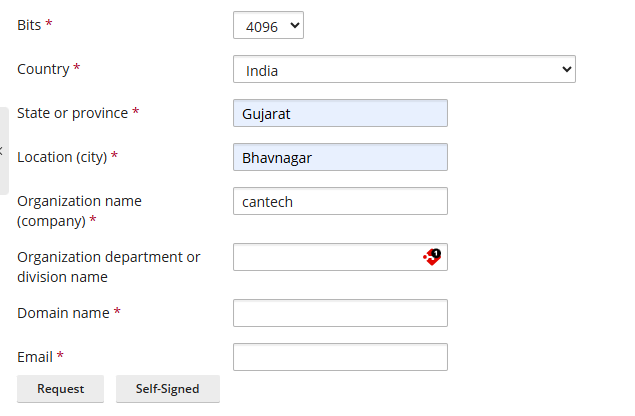
5. In Certificate name enter a name for your SSL certificate. Complete the remaining fields as shown in the screenshot, then click Request.
Click on your SSL certificate.
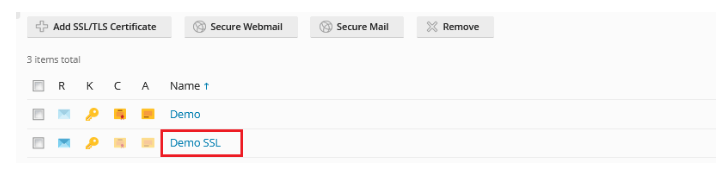
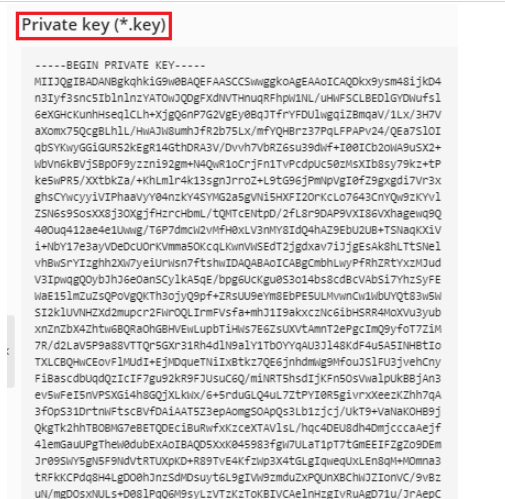
Scroll down to the bottom. One of the Sections will contain the Generated CSR and Private Key. They will look like this:

You may choose the Self-Signed option. Under this option, you verify the identity of your site. This option is not recommended as self-signed certificates are not secure and will leave user questioning the genuineness of the website.
Conclusion
You have now generated the cryptographic basis of your website as well as the Private Key which is now safely seated in your Plesk repository. This Private Key is integral in your web security because it is the only key needed to off the encryption to the traffic being sent to your server, hence it is very critical that you do not disclose this key to anyone. Unlike the Private Key, you are meant to disclose the CSR to your Certificate Authority in order to complete your purchase.
You will come back to this same menu in Plesk once the CA processes your order and your certificate is ready for you to download. You’ll have your certificate in the form of .crt files and you install it, hence completing the process. You can now be certain that you have successfully managed this process, as you will be able to issue your users a seamless trusted encrypted connection, unlike before where they faced a “Not Secure” warning.