How to Create and Manage API Tokens in cPanel?
Introduction
API is a unique identifier or authentication that lets an application access service. It is possible to create and manage API Tokens in cPanel from 80 onwards. The main function of API token is to grant a user access to the server without logging in with password.
By issuing API Tokens, it is possible to grant permissions to third-party developers to carry API2 and UAPI operations.
Step 1: Log in to cPanel account.
Step2: Go to the SECURITY section and select Manage API Tokens.
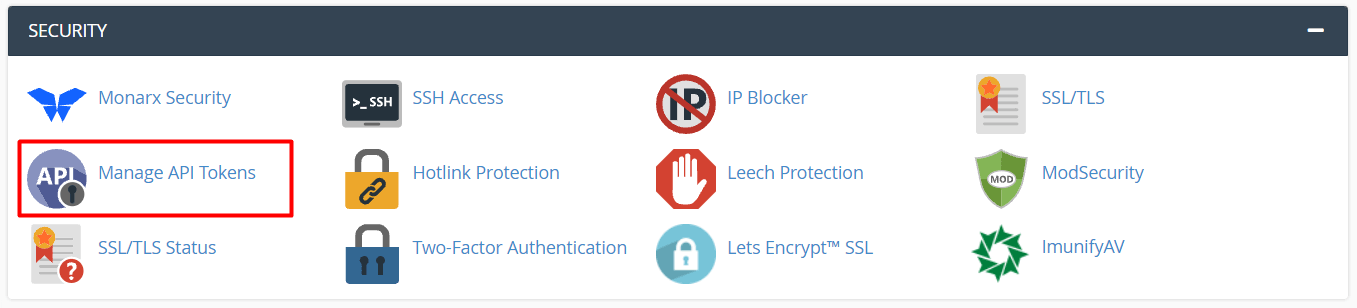
The managed API tokens panel will show up.
Process To Create API Tokens
Here are the ways to create API tokens.
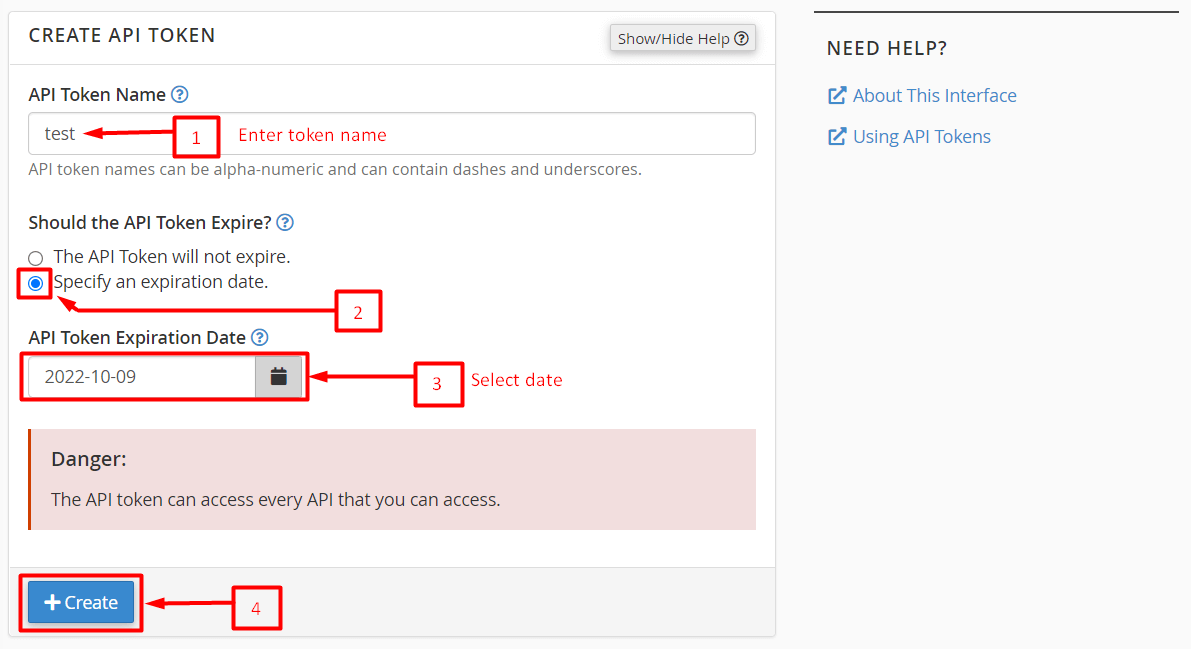
Step 1: Firstly, enter the name for API Token in the API token name field.
Step 2: Choose to mention an expiration date option.
Step 3: Choose a date from the calendar in API Token Expiration Date. The token will remain usable till that date.
Step 4: Click on Create.
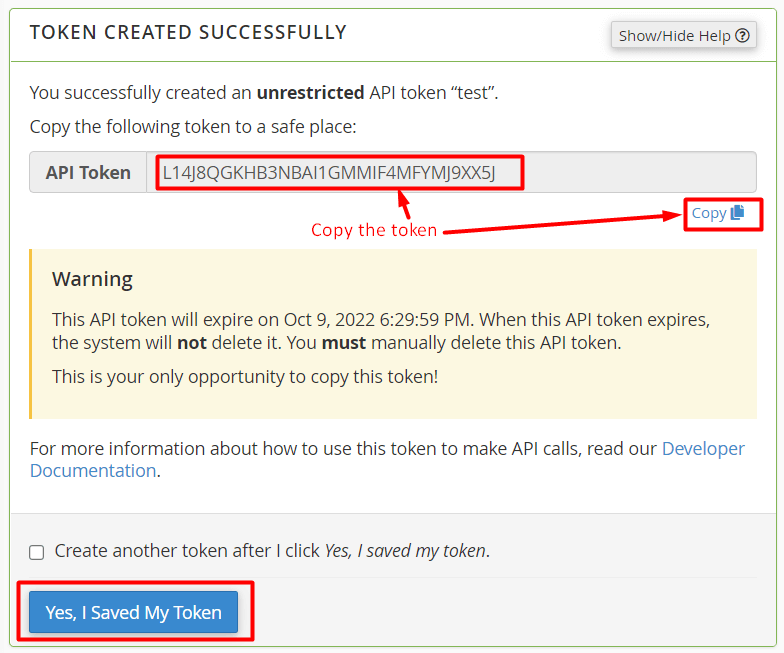
A success message appears as cPanel creates a new token.
Step 5: Copy the API token someplace discreet to share it with your operator later.
Step 6: Click on Yes, I saved my token button.
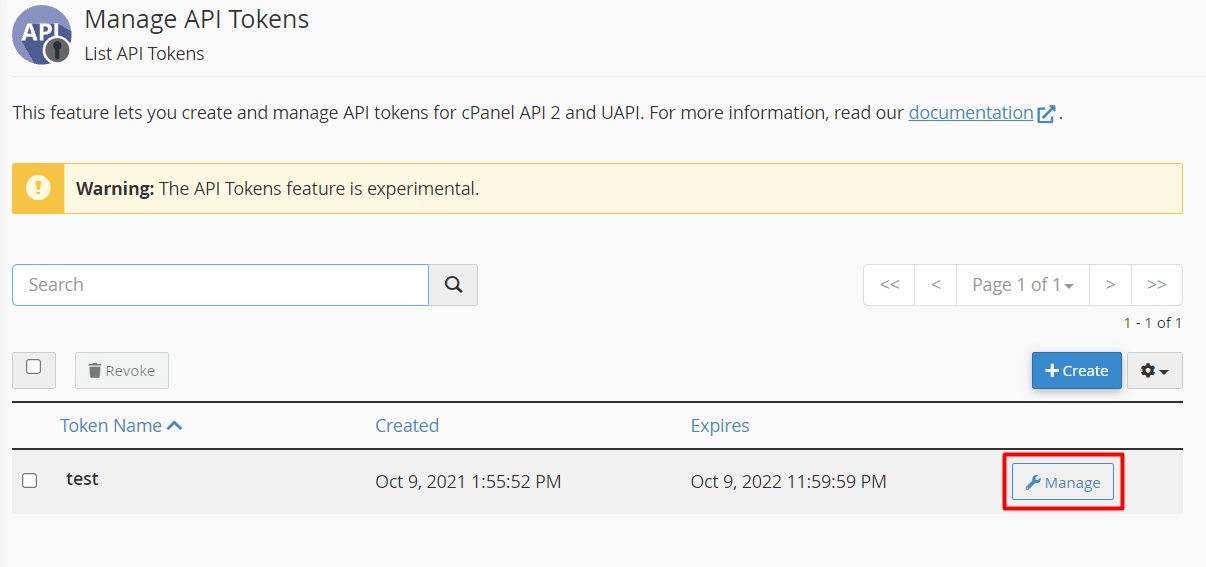
The API token you created appears in the list for the active API tokens.
Steps to Manage API Tokens
Step: Click the Manage button for the API token you want to manage.
Here, there are two sections:
- Manage API Token: Here, you can change the name for the API Token.
- Revoke API Token: It lets you discard the API token.
Manage API Token
Step 1: Enter the new name for the API token in the New API Token Name field.
Step 2: Click the Update button.
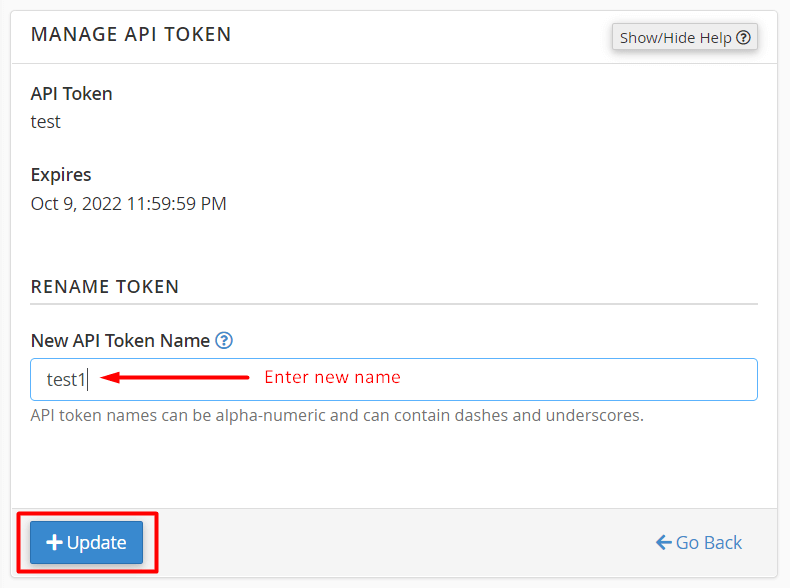
The name of the API token will change to the new one you just updated.
Revoke the API Token
Step 1: Click on Revoke the token.
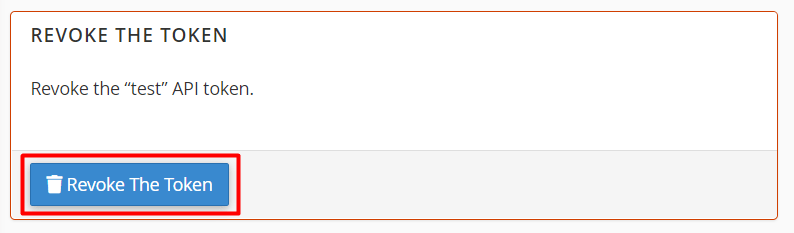
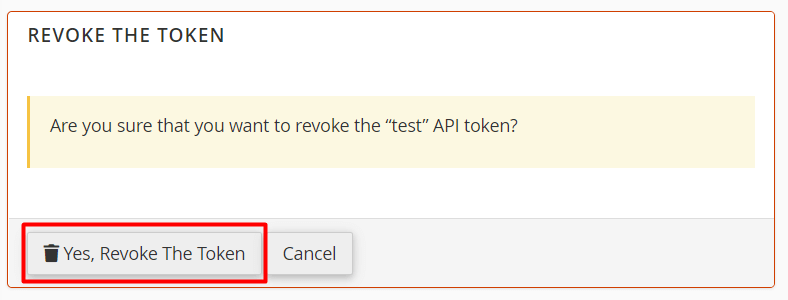
A message will flash asking for confirmation.
Step 2: Click Yes, Revoke the token button.
Conclusion
The system turns the API token invalid and removes it from the list of active tokens. That is all there is to know regarding configuring API tokens in cPanel.
