How to Connect a Microsoft Access Database(MDB) in Windows Plesk?
Quick answer box
You need to upload your file to your domain, go to Websites & Domains, ODBC Data Sources, Add ODBC DSN, choose Microsoft Access Driver, set DSN name, file path to your MDB file and press OK.
Introduction
Microsoft Access databases (MDB) are considered to be quite an old type of database management system; however, such systems are actively used for small business sites and legacy ASP applications. Typically, hosting such databases requires Windows Plesk servers; although the process is not complicated, it involves a lot of subtle steps that are easy to miss. For example, ODBC settings or incorrect folder permissions can cause the “Cannot open database” error.
This article explains how to connect an MDB database in Windows Plesk with all the necessary steps. Uploading a file, creating a connection, and testing it with a sample connection string are the minimum required actions to ensure the database works properly. Below are detailed instructions.
Steps to Connect MDB in Windows Plesk
Here are the steps to connect MDB in Windows Plesk:
Step 1: Access ODBC Data Sources
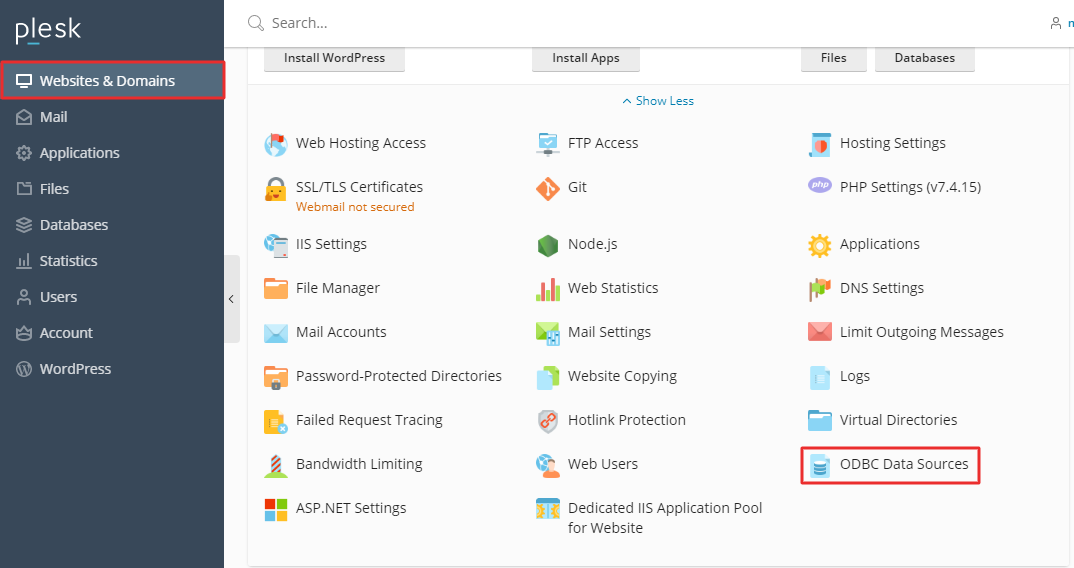
Log in to your Plesk account with your credentials and in the left pane select Websites & Domains, then access ODBC Data Sources.
Step 2: Add New ODBC DSN
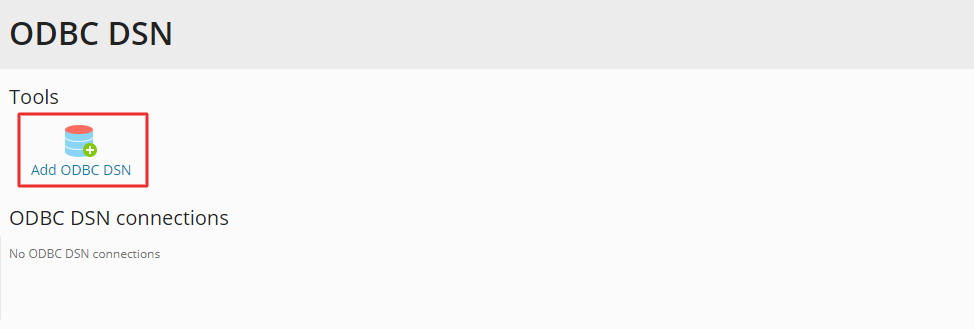
Select the option to Add ODBC DSN.
Step 3: Configure Connection Settings
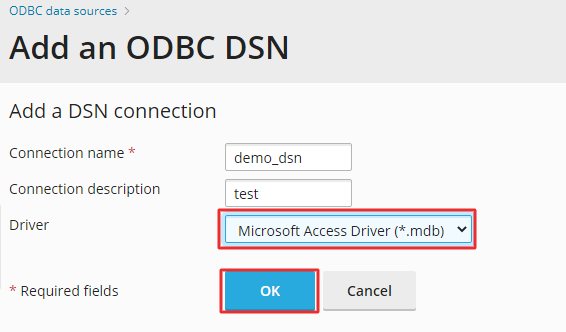
Provide a connection by using names only in letters and numbers (no spaces or symbols allowed). Another way is, add a description in the Connection Description field. Choose Microsoft Access Driver (*.mdb) from the driver dropdown list. Once everything is configured, press OK.
Step 4: Mention Database Path and Credentials
Input the database file path in the designated field. If your database is password-protected, provide the Login ID and Password as required.
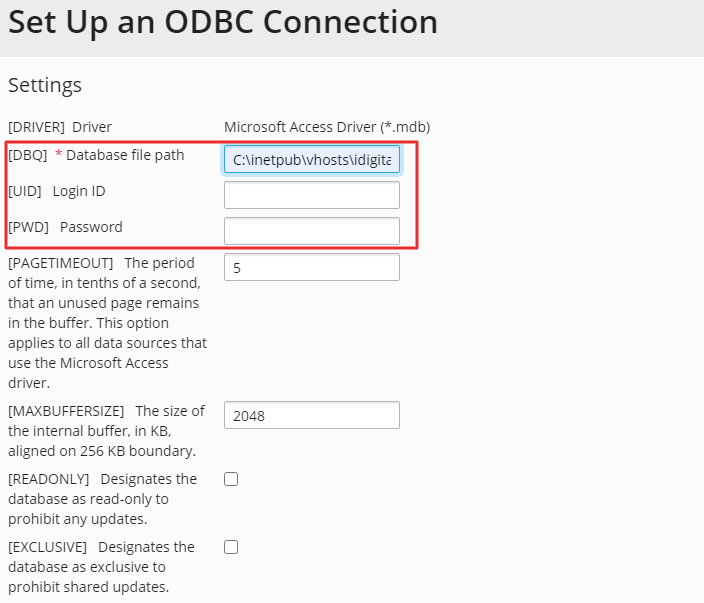
Note: It is advisable to retain the default values for other fields unless you comprehend their functionalities.
Step 5: Test and Save Connection
Navigate to the bottom and select Test Connection to ensure the connection functions correctly. A success message will confirm the successful connection. Finally, click Finish to save the settings and complete the procedure.
Conclusion
The general idea of connecting an MDB database in Windows Plesk is to upload the file to the server, set the right permissions for the folder, and define a DSN connection string. After that, your legacy application will function correctly, free from any database-related errors. If it is not the case, check whether your database engine is supported and the permissions are set correctly.
