Set up Custom Name Servers for Windows Hosting accounts in Plesk
This article helps you set up custom name servers for Windows Hosting accounts with Plesk. For domain example.com you may set up custom name servers as ns1.example.com and ns2.example.com.
Creating custom name servers requires two steps.
First, you need to set up the A record for the custom name servers (or check to ensure you already have functioning A records for the name servers).
Second, you need to register custom name servers with your domain registrar.
Step 1: Instructions for Adding Records for the Custom Name Servers
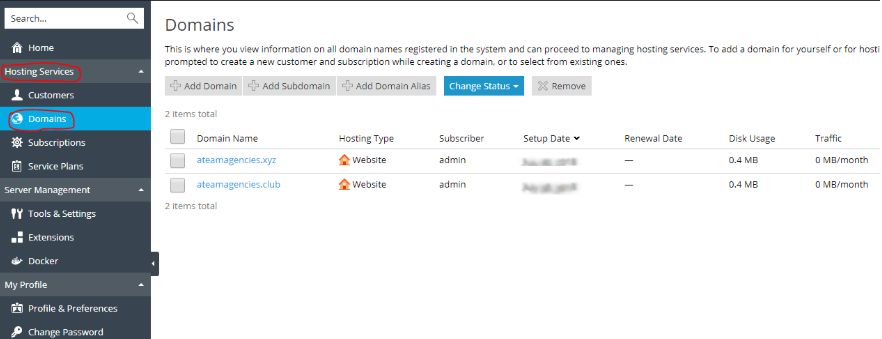
1. Enter Plesk with your Reseller account.
2. On the left side of the panel, navigate to Hosting Services and Domains.
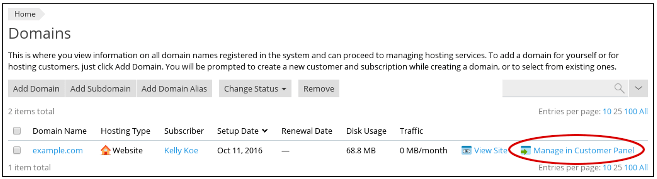
3. Find the domain for which you wish to change the DNS settings and select Manage in the Customer Panel.
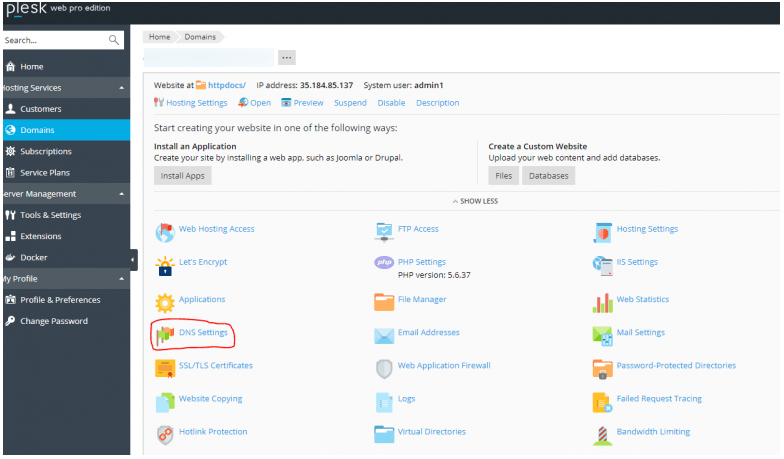
4. Click SHOW MORE to see more options and then select DNS Settings.
5. Select the NS record for ns1.example.com.
6. In the section titled Edit the Resource Record, enter the Custom Name server record in the Name Server text box.
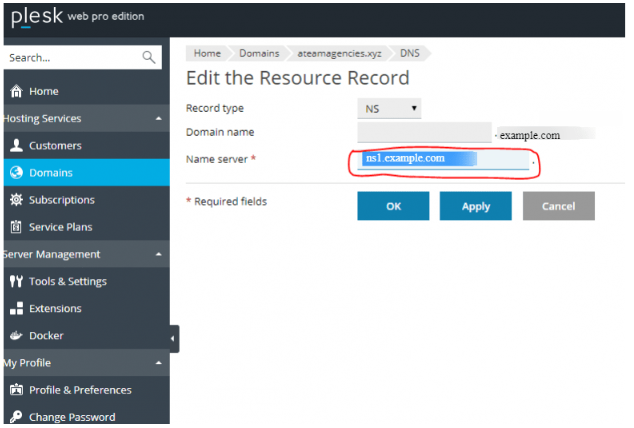
7. Press the OK button.
8. For the ns2.example.com name server (NS) record, perform the same actions as steps 5 through 7.
9. The Websites & Domains screen shows the following message:
Changes to your DNS records are not saved. The changes are indicated in your records. To apply these changes, click Update to save your changes to the DNS zone. To discard changes, click Revert.
Now click Update. You will notice the changes in DNS.
Step 2: How to register Custom Name Servers
After confirming that your domain has the proper A records in place, proceed to register the name servers.
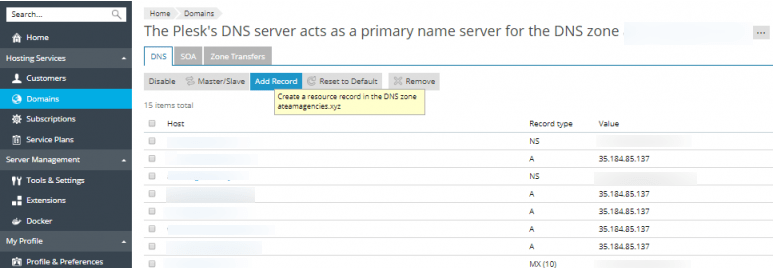
1. In the Plesk panel, navigate to Domains and select Add Record.
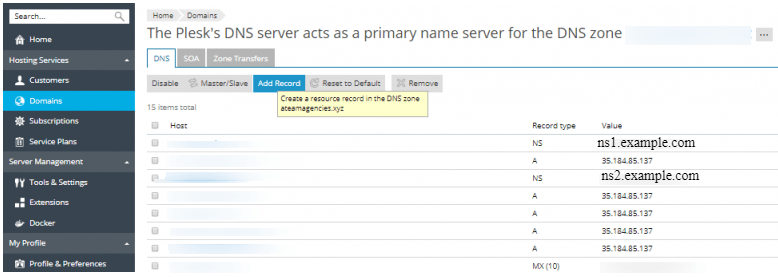
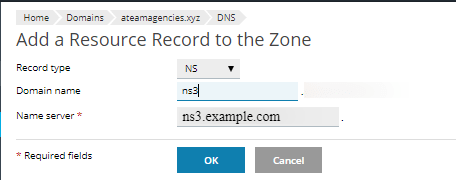
2. In the section labeled Add a Resource Record to the Zone, choose NS from the drop-down list for Record type, enter your domain along with the Name Server, then click the OK button.
3. A page will appear with a message that states: “The changes you have made to DNS records are… (some DNS records still are in a pending state in the DNS zone). Click… to update… or revert changes.”

4. The list of Hosts you modified will all be selected in the Highlighted section. Select Update to apply the changes you have made.
# Instructions for Adding Records
1. Navigate to Domains and select Add Record.
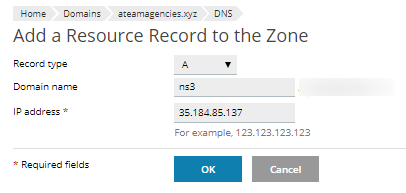
2. In the section titled Add a Resource Record to the Zone, select the type of record you want to add as an A record. Fill in the Domain name, and the IP address, and click OK.
3. Click Update to save all your changes.
Make sure you also update the domain registrar with the new Nameserver. Changes will reflect in approximately 24 hours.
Conclusion
Getting the custom name servers configured is an important milestone in fostering a cohesive and professional brand identity for your hosting setup. Having your own branded name servers (e.g. ns1.yourdomain.com) instead of generic provider URLs increases your brand credibility and provides you more flexibility in managing your DNS.