Step by Step Process to Restore a Database Backup in cPanel
This article will explain the process to restore your MySQL database from the database backups you have in cPanel.
Restoring your database to an earlier backup can save you a lot of time if you accidentally deleted information from your site database or if the database corruption occurred for various reasons.
Of course, you need to have a previous backup of your database in order to restore to it. It’s a good practice to keep a backup of the database before making significant changes to your site, or before updating to a newer version of the software that runs your site.
How to Restore a Database Backup in your cPanel?
Step 1: Log in to your cPanel. (You can demo the login of cPanel live here, using the Username: ctdemo | Password: lm4HPl82*PQC for free)
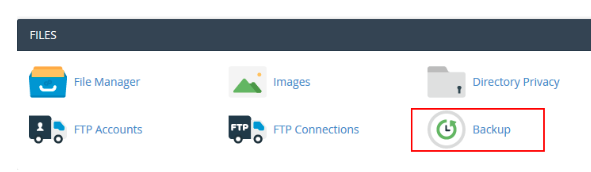
Step 2: Click Backup found on the files section.
Step 3: Under Restore a MySQL Database, click Choose File.
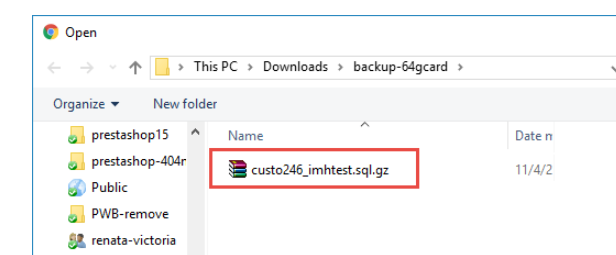
Then find the database backup you want to restore from in the file browser, click on it and select Open.
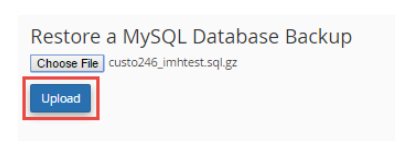
You should see the database backup you have uploaded. Click on Upload.
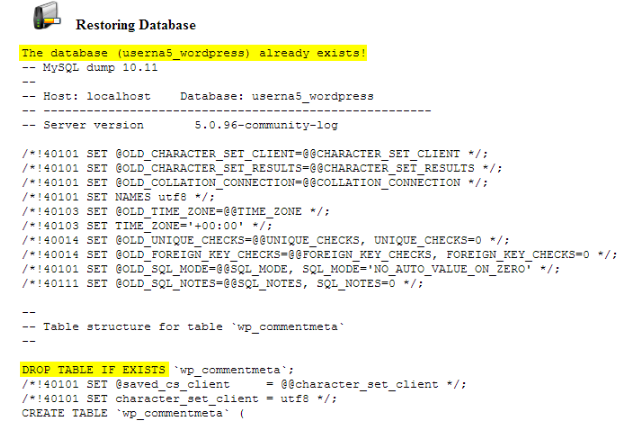
As you gently scroll, you will see the full backup that you restored and that our userna5_wordpress database had existed (as it should) and using the DROP TABLE IF EXISTS which works nicely.
Now you have restored the backup of the database you had and fixed the missing data or the correct functionality of your site.
Conclusion
Your database restoration process using the phpMyAdmin tool in your cPanel account is complete, and you were able to retrieve your website’s data, which includes your posts, users, and settings. Your website is now up and running with the restored database.