How to Add Signature to your Webmail Account via cPanel?
Email signatures are like electronic calling cards. Adding a professional touch to your message will appeal to your recipients. cPanel does not have a setting to assign a signature to your email, so you will need to access Webmail to add your signature.
To Access Webmail Account
1. Log in to your cPanel account.
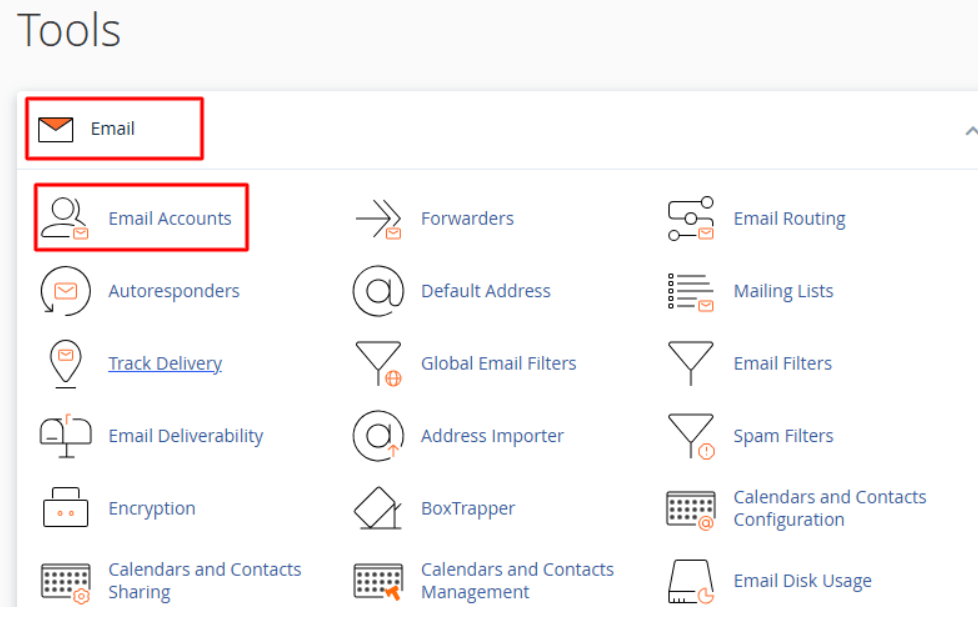
2. In the “Email” section, click on Email Accounts.
The cPanel hosting panel will display a list of your active email accounts.
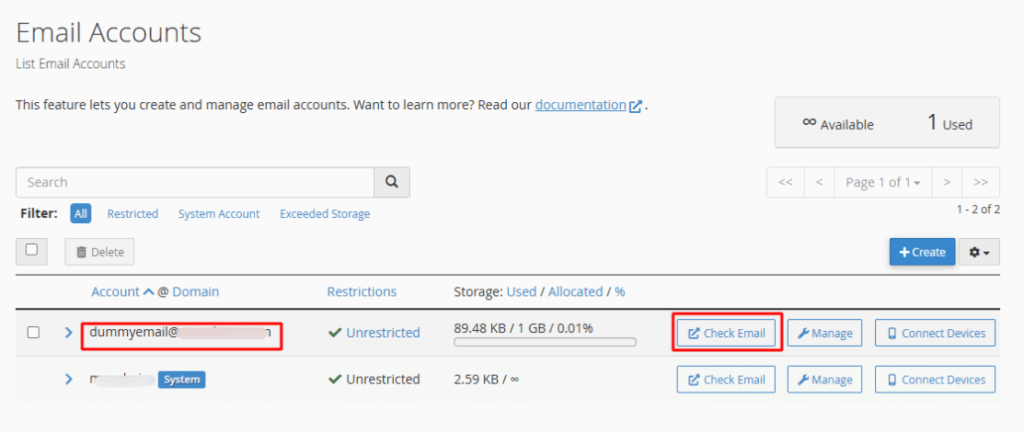
3. To add a signature to the email account, click Check Email.
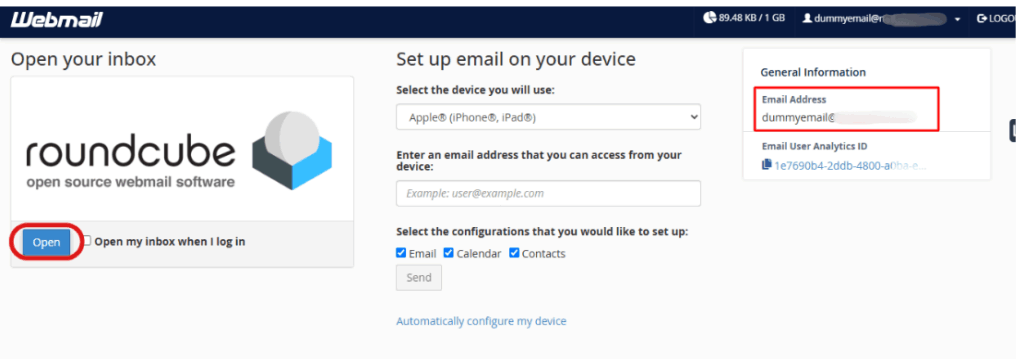
You can configure signatures in your Webmail client by going to the Webmail interface.
Steps to Add a Signature in Roundcube
Step 1: Open Webmail. Using Roundcube’s interface, locate and click “Open”.
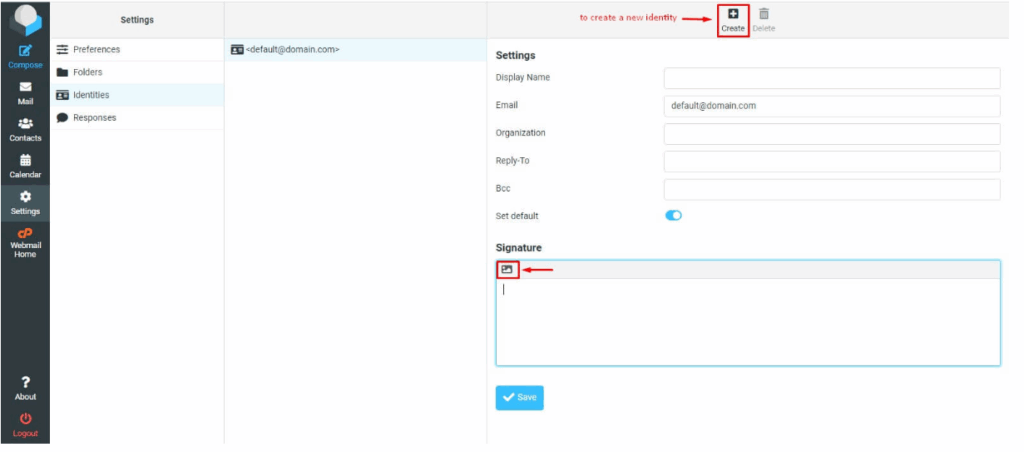
Step 2: Click on Settings in the side menu. And click on Identities (in the Settings panel).
You will see a list of existing identities. Your signature will appear in the email that appears with the identity.
Note: You can use an existing signature or create a new one.
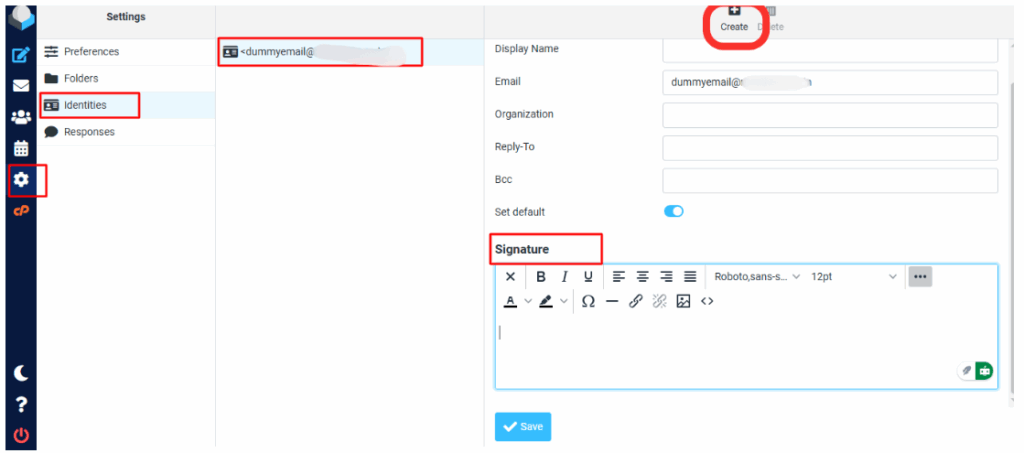
Step 3: Create a new signature by entering the required information and clicking ‘Create’.
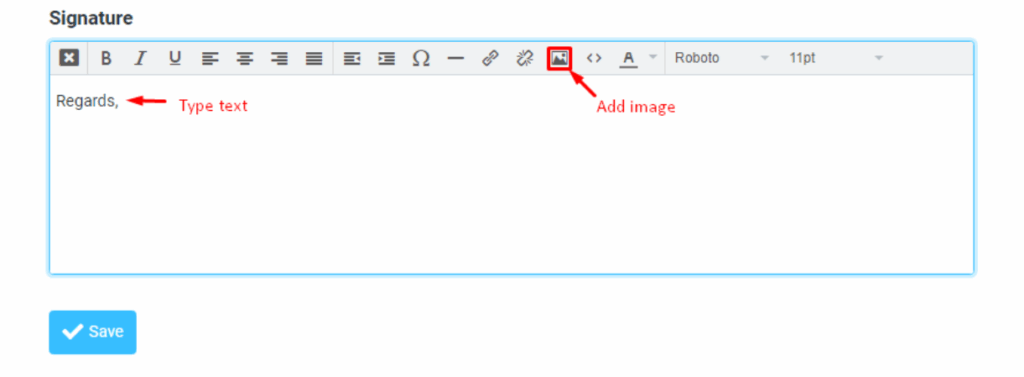
Step 4: To add your signature content, click the HTML button in the ‘Signature’ box.
For creating a signature, you have a number of options.
5. Add your signature by clicking the HTML icon in the Signature field.
Your signature can be created in a variety of ways.
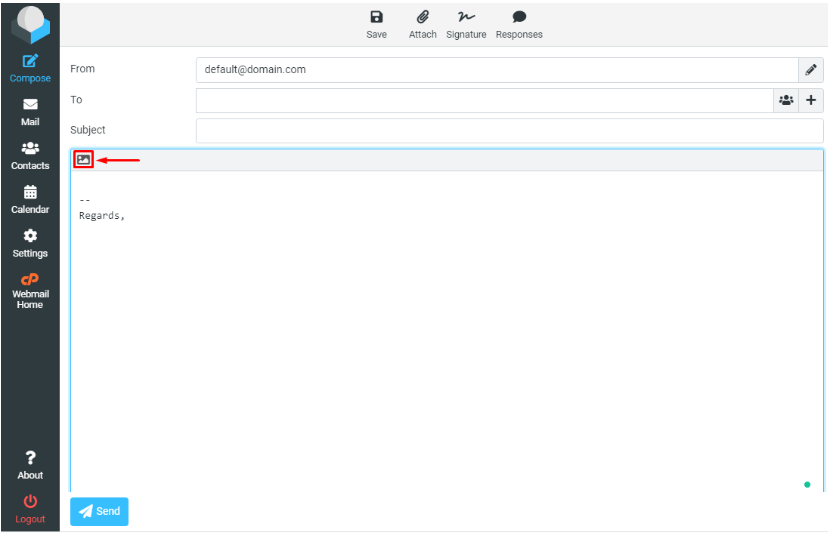
Step 5: Add an image and text signature. To add an image, click the image icon in the toolbar.
A window will pop up where you can insert/edit an image.
Step 6: The next step is to select the browse icon beside the Source text box.
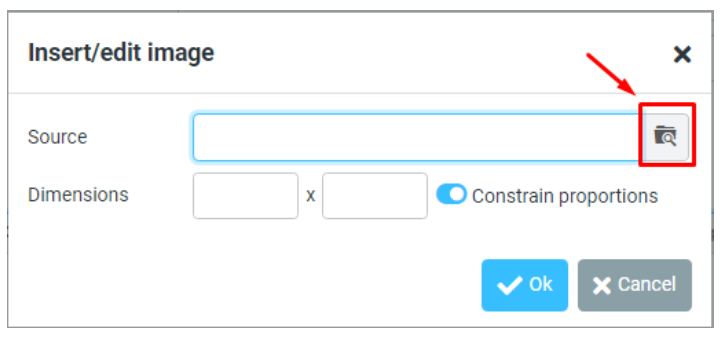
Step 7: Click on the uploaded image after you have browsed and uploaded it from your local machine.
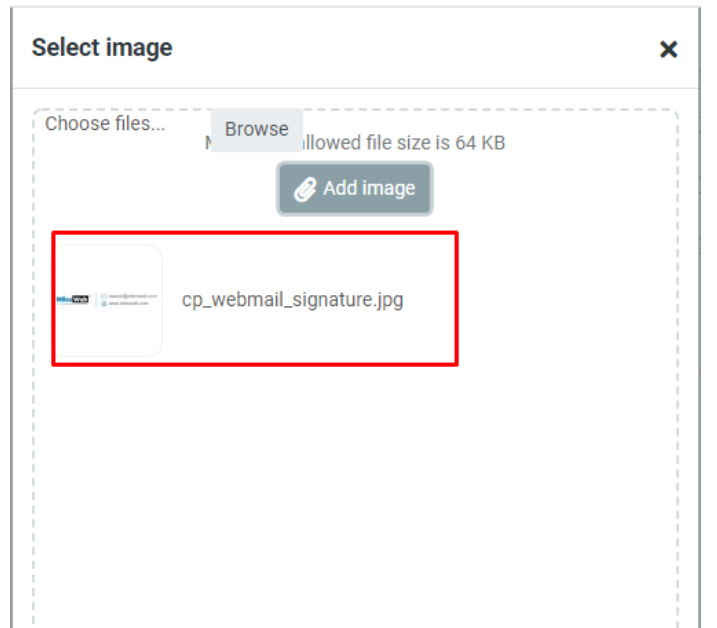
Step 8: In the Source field, the details of the image will be automatically filled in.
Step 9: The next step is to click on the “OK” button.

It will add the image to the Signature.
10. Click Save.
There will be a flashing message: Successfully saved. Your Webmail identity has been updated with the Signature.
You can type HTML in Roundcube’s message box next time you compose an email.
This will cause the email signature image you set for the email to appear when it begins composing the mail in HTML.